• Welcome to H4O! For a reduced ad experience, please login or register with the forum.

H3T How do you Rebuild a Prop Shaft CV Joint??

RamRod

Well-Known Member
Messages
3,914
Location
AB, Canada
I have been looking all over the net to see how to replace the broken CV joint on my. Prop shaft with this new one but I have come up with nada!

If someone could give me some instruction that would be great, then I will do a proper rebuild thread how to for everyone future reference

Thanks guys!
 

H3slate

Brush raked
Messages
983
Location
Tualatin, Oregon
Do you mean the u joint? There are quite a few videos on how to replace the u joints.

Or are you talking about the joint in the front propeller shaft that attaches to the transfer case?
 

4speedfunk

Well-Known Member
Messages
4,250
Location
Tardville
I think someone on here has done that (maybe Happy Hummer?)....can't recall. I think it must be pressed on & off. Standard practice is to replace the entire shaft...far less labor-intensive than beating on the CV.

If you are running the Rancho kit...you might have a hard time getting the stock CV to last. The extra angle plays hell with the rubber boot. The joint itself can take it...but the boot is the problem. Make sure you scoot the boot down on the shaft, (closer to the joint) to try to get as much extra flex in the boot as possible. This is mentioned in the Rancho instructions, and it sort of works...for awhile. Many of us have converted to a cardan CV for this same reason. The stock six-ball design is great at cancelling vibrations but, it is entirely dependent on that fragile boot staying intact. Just like half-shafts...once a tiny rip opens up, the grease will exit the joint immediately from centrifugal force. When this happens, its easy to spot...look for grease all over the tranny tunnel at the front of the t-case.

Myself and many other guys have been running cardan joints on our H3's for years...with very mixed results. The cardan does not cancel vibes quite as well but, it is fully greaseable and much stronger than the 6-ball. I've had two or three different shafts (all GM 3R cardans) and I'm not real happy with the overall performance. So, I am currently working on an adapter that will bolt to the t-case flange and allow the use of a smaller, lighter weight, 1310 cardan. This will have much less spring pressure and mass than the big ole clunky 3R...and hopefully yield a smoother ride, especially on the high-way. Tom Woods, Hi-Angle, and many other driveline shops should be able to get you something similar.
 

06 H3

a.k.a. "The Jackal"
Messages
9,506
Location
Meridian, ID
I agree on all points, I have been having some driveshaft issues and have been bugging CJ (sorry!) about other alternatives because I wasnt getting too far with other places. I called around from shop to shop. High angle driveline, Tom woods, Coast driveline and a local shop. The local shop I dealt with their fabricator who makes the drivelines and helped me with some of the issues I have been having but its tough for HAD and tom woods to come up with less expensive solutions and I want them to see the H3 t case in person its much different then anything else. I drove down to coast driveline and he told me to put the H3 on railroad tracks so hes not getting my business.

CJ has been talking about this idea and in the end he has the CAD ability that I dont have. Anyways this new solution he has should hopefully be badass! When I start running it I will keep you posted. I think the end goal is more affordability compared to HAD and Tom woods, the strength of the current driveshaft we have been running and smoother then the current one.
 

Best4x4

Well-Known Member
Messages
1,042
Location
Vidor, TX
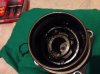
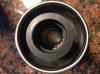
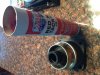
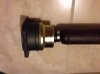
CV Replacement:

attachment.php


attachment.php


attachment.php


Okay the pics are off my phone sorry lol. However the job is rather quick and simple.

Remove the drive shaft from your H3 and removing the TC Skid makes it quicker/easier.

Next you have to remove the clip that holds the CV onto the drive shaft. Since your boot is most likely destroyed it should make it easy to see. If not cut the old boot off.

Remove the clip, and then pack the new CV with grease. I used some Lucas Red & Tacky #2. Then re install the drive shaft into the CV. You'll either hear it click or feel it lock into place.

Once the shaft is put together re install it on your H3. The very last step is securing the new boot. You don't want it to tight or it will quickly tear. Once it's in a good position secure it using the supplied boot clip.
 

Attachments

  • image.jpg
    image.jpg
    677.2 KB · Views: 4,095
  • image.jpg
    image.jpg
    644.8 KB · Views: 4,318
  • image.jpg
    image.jpg
    744.1 KB · Views: 4,140
  • image.jpg
    image.jpg
    611 KB · Views: 2,490
Last edited:

RamRod

Well-Known Member
Messages
3,914
Location
AB, Canada
I think someone on here has done that (maybe Happy Hummer?)....can't recall. I think it must be pressed on & off. Standard practice is to replace the entire shaft...far less labor-intensive than beating on the CV.

If you are running the Rancho kit...you might have a hard time getting the stock CV to last. The extra angle plays hell with the rubber boot. The joint itself can take it...but the boot is the problem. Make sure you scoot the boot down on the shaft, (closer to the joint) to try to get as much extra flex in the boot as possible. This is mentioned in the Rancho instructions, and it sort of works...for awhile. Many of us have converted to a cardan CV for this same reason. The stock six-ball design is great at cancelling vibrations but, it is entirely dependent on that fragile boot staying intact. Just like half-shafts...once a tiny rip opens up, the grease will exit the joint immediately from centrifugal force. When this happens, its easy to spot...look for grease all over the tranny tunnel at the front of the t-case.

Myself and many other guys have been running cardan joints on our H3's for years...with very mixed results. The cardan does not cancel vibes quite as well but, it is fully greaseable and much stronger than the 6-ball. I've had two or three different shafts (all GM 3R cardans) and I'm not real happy with the overall performance. So, I am currently working on an adapter that will bolt to the t-case flange and allow the use of a smaller, lighter weight, 1310 cardan. This will have much less spring pressure and mass than the big ole clunky 3R...and hopefully yield a smoother ride, especially on the high-way. Tom Woods, Hi-Angle, and many other driveline shops should be able to get you something similar.

I will likely do an upgrade so this will not happen again but for now this will get me back on the trails.... Can't wait to see what you come up with!
 

RamRod

Well-Known Member
Messages
3,914
Location
AB, Canada
attachment.php


attachment.php


attachment.php


Okay the pics are off my phone sorry lol. However the job is rather quick and simple.

Remove the drive shaft from your H3 and removing the TC Skid makes it quicker/easier.

Next you have to remove the clip that holds the CV onto the drive shaft. Since your boot is most likely destroyed it should make it easy to see. If not cut the old boot off.

Remove the clip, and then pack the new CV with grease. I used some Lucas Red & Tacky #2. Then re install the drive shaft into the CV. You'll either hear it click or feel it lock into place.

Once the shaft is put together re install it on your H3. The very last step is securing the new boot. You don't want it to tight or it will quickly tear. Once it's in a good position secure it using the supplied boot clip.

So is the clip on the rubber side of the joint? A bunch f vids I watched for other car with the same CV joint on the driveshaft had a clip on the back side of the drive shaft and the CV had to be split in two to get to it....

Looks like mine came pre greased from the manufacturer, Dorman... I got some #2 Lucas on stand by if not though lol
 

amrg

Well-Known Member
Messages
2,317
Location
Qatar
So is the clip on the rubber side of the joint? A bunch f vids I watched for other car with the same CV joint on the driveshaft had a clip on the back side of the drive shaft and the CV had to be split in two to get to it....

Looks like mine came pre greased from the manufacturer, Dorman... I got some #2 Lucas on stand by if not though lol
Do you have a part number for that C.V? (For future reference)
 

Best4x4

Well-Known Member
Messages
1,042
Location
Vidor, TX
The clip is down on the CV side. There is a notch where the ends of the clip are visible. Spread them apart and pull up at the same time. My replacement was also a dorman unit, but it didn't have any grease with it.
 

SuperBuickGuy

Well-Known Member
Messages
3,403
Location
Woodinville, WA
that clip is important, you won't get it apart without pulling it off... I'm glad you have pictures of the swap, I don't think I took any pictures when I swapped mine... however, you can see in your new joint the clip that needs to come out - but you do not have to take that clip out to put the new one on, it will slip right past it then hold the joint together.
 
Last edited:

Best4x4

Well-Known Member
Messages
1,042
Location
Vidor, TX
Yeah you don't have to take it out either during the un-install either. You just have to open it up enough to allow you to pull out the drive shaft from the CV, I removed it in the one pic to show what it looked like.

I took pictures, just never had a chance to do a proper write up. Whole job from start to finish was maybe an hour. Really quick and easy in my opinion.
 

deserth3

Well-Known Member
Messages
1,079
Location
Conroe, TX
I got my cv kit off amazon. Since the old one is trash I took a hacksaw to the top of it. Once you look inside things become self explanetory.
All you have to do with the new cv joint is align the splines on the shafts and push the shaft in until the clip engages. Don't forget to Grease the joint first.

Sent from my SAMSUNG-SM-G900A using Tapatalk
 

Best4x4

Well-Known Member
Messages
1,042
Location
Vidor, TX
Yeah I'm kinda surprised my kit didn't have the bag of CV Grease with it, but no biggie. I just packed it with the Lucas Red & Tacky #2 since I've had awesome results with that grease. Once I had it packed really good, I installed the rest of the drive shaft into the new CV it clicked into place and I was good to go. However DO NOT go ahead and secure the boot until it is on your H3. Several people in another thread complained that their replacement units were tearing the boots after barely 1K. I looked into this when I was rebuilding mine, and sure enough if you placed the boot in the exact position as the OEM Boot it was to tight and the boot would have probably torn in very little time. I slid it back until the boot had plenty of slack/movement. I've got close to 6K on mine now without a single issue.
 

4speedfunk

Well-Known Member
Messages
4,250
Location
Tardville
True. I think the idea is that the "cup" is supposed to add some shelter to protect the boot. It would be nice if there were a second boot that went over the top of everything.
 

Best4x4

Well-Known Member
Messages
1,042
Location
Vidor, TX
Probably an old Shock Boot would work, but around here it would just keep in more moisture vs leaving it as is. As long as the boot isn't pulled to tight with the new CV you should be good to go. My original CV on my Alpha didn't fail, just the boot. The CV on our H3's is much easier to find/deal with vs what the JK's come with. I have seen them just blow apart out on the trail leaving the JK Owner stranded.
 
Top