Chris Laun
Well-Known Member
- Messages
- 78
- Location
- Los Angeles, CA
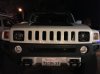
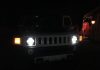
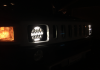
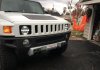
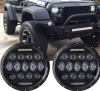
So as some as you asked for in another thread, I'll go ahead and post some more pictures and explain how I installed these headlights:
Into here!
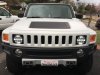
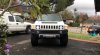
I probably should have taken pictures while I was working on this but with Christmas looming and family arriving, I had to get these installed and working as soon as possible, and skipped the pictures :emb: But worry not! This was a simple retrofit, and works great so far! I started by pulling the stock headlights out and taking a look at how they mounted to the body. After seeing how well the 3 ball-post mounts worked on the stock unit, I decided to just mimic that layout with 2 metal brackets attached to the new LED housing.
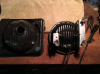
I measured the distance from the desired new-headlight position, to the plastic housing with the 3 mounting posts, and found a metal framing strap (as a contractor/finish carpenter, I have a lot of these laying around) that just happened to be the perfect size to be bent, drilled, and fitted to the new headlight unit.
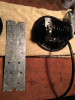
I cut two equal lengths of strap to mount on the outsides of the new headlights to attach to both the top and bottom mounting posts. This allows the new LED light to be adjusted by the factory top post, which aims the housing up and down. If I can recall correctly, the bend is at exactly 2" for both the outer and inner brackets.
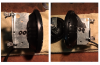
Slight trimming is needed on each bracket to clear the plastic housing mounted to the body.
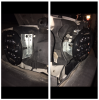
I utilized the original ball-mount-clips and mounted them to the new brackets with some small machine screws and locking nuts. I then mounted the brackets to the LED housing with four 5/16-18 X 3/4 hex head bolts.
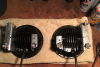
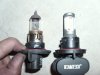
And thats that! As soon as you have the brackets done, the hardest part is over! The next step is wiring it up, but unlike me, try and do it without blowing 10 fuses!:shame:Start by pulling fuses 40 and 41 as to not blow them while installing the new lights. I learned these lights alternate the ground to enable the high beams, while the H3 does not. I didn't have the time or patience to figure out how to get the high beams working, so I wired it up to enable the low-beams and DRL's to run simultaneously. Thankfully, my headlight units came with 2 adapter cables, one for each light, and had a plug receiver that was exactly the same as the stock headlight bulb!
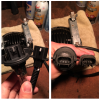
After simply plugging them into the H3 headlamp bulb connectors, I connected the White wire from the adapter to the brown (ground) wire going to the LED headlight. Then, after about 4 blown fuses, I found out the blue wire on the adapter needs to connect to the blue wire going to the headlight. In conjunction to that, the Black wire from the adapter ALSO has to be connected to the blue wire going to the headlight. If you notice the yellow and green wire below, that is the positive leading to the DRL. I connected this to the blue/black conjunction to run the low-beams and DRL's simultaneously. The black wire leading to the headlight, is the wire that activated the high-beams. If that wire is touches the blue wire powering the low-beams, it seems to short the system. So, I simply cut the wire and isolated it to make sure it cannot short the system out.
SO, the wiring goes as follows with this particular adapter:
WHITE -> BROWN
BLACK & BLUE-> YELLOW/GREEN & BLUE
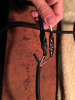
After this, the headlights will work perfectly! They will automatically function just as the stock ones do, except you will not have any high beams. And this is where the next issue I had came into play. If you went to activate the high beams or the flash-to-pass (or just bumped it on accident and found out the hard way), it would blow both headlight fuses. Due to the relay alternating a wire other than the ground, it blows the fuses and leaves you with no lights. The simple solution I found to this problem:
Cut the wires that activate the high-beams and flash-to-pass until I can re-wire the relay and have it alternate the correct wire. Pulling the relay will stop the headlights from functioning altogether and is not an option.
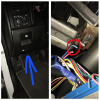
SO, under the dashboard on the drivers side, you will look up and see a big grey and blue connector. There is a pink wire (don't worry its the only pink one in there) and a light blue/white wire (its a light blue wire with a white stripe) Those two wires are connected to the signal stalk and activate the high beams. Cut those two wired to disable all high-beam action, and you will not blow any fuses!
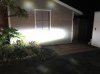
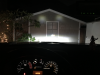
And thats all there is to it!:giggle: I still want to paint my brackets and get the relay wired correctly to enable the use of the high beams, but for now the most important thing is they work great and are better than the stock lights! Thanks for reading everyone and Happy Holidays!
Into here!
I probably should have taken pictures while I was working on this but with Christmas looming and family arriving, I had to get these installed and working as soon as possible, and skipped the pictures :emb: But worry not! This was a simple retrofit, and works great so far! I started by pulling the stock headlights out and taking a look at how they mounted to the body. After seeing how well the 3 ball-post mounts worked on the stock unit, I decided to just mimic that layout with 2 metal brackets attached to the new LED housing.
I measured the distance from the desired new-headlight position, to the plastic housing with the 3 mounting posts, and found a metal framing strap (as a contractor/finish carpenter, I have a lot of these laying around) that just happened to be the perfect size to be bent, drilled, and fitted to the new headlight unit.
I cut two equal lengths of strap to mount on the outsides of the new headlights to attach to both the top and bottom mounting posts. This allows the new LED light to be adjusted by the factory top post, which aims the housing up and down. If I can recall correctly, the bend is at exactly 2" for both the outer and inner brackets.
Slight trimming is needed on each bracket to clear the plastic housing mounted to the body.
I utilized the original ball-mount-clips and mounted them to the new brackets with some small machine screws and locking nuts. I then mounted the brackets to the LED housing with four 5/16-18 X 3/4 hex head bolts.
And thats that! As soon as you have the brackets done, the hardest part is over! The next step is wiring it up, but unlike me, try and do it without blowing 10 fuses!:shame:Start by pulling fuses 40 and 41 as to not blow them while installing the new lights. I learned these lights alternate the ground to enable the high beams, while the H3 does not. I didn't have the time or patience to figure out how to get the high beams working, so I wired it up to enable the low-beams and DRL's to run simultaneously. Thankfully, my headlight units came with 2 adapter cables, one for each light, and had a plug receiver that was exactly the same as the stock headlight bulb!
After simply plugging them into the H3 headlamp bulb connectors, I connected the White wire from the adapter to the brown (ground) wire going to the LED headlight. Then, after about 4 blown fuses, I found out the blue wire on the adapter needs to connect to the blue wire going to the headlight. In conjunction to that, the Black wire from the adapter ALSO has to be connected to the blue wire going to the headlight. If you notice the yellow and green wire below, that is the positive leading to the DRL. I connected this to the blue/black conjunction to run the low-beams and DRL's simultaneously. The black wire leading to the headlight, is the wire that activated the high-beams. If that wire is touches the blue wire powering the low-beams, it seems to short the system. So, I simply cut the wire and isolated it to make sure it cannot short the system out.
SO, the wiring goes as follows with this particular adapter:
WHITE -> BROWN
BLACK & BLUE-> YELLOW/GREEN & BLUE
After this, the headlights will work perfectly! They will automatically function just as the stock ones do, except you will not have any high beams. And this is where the next issue I had came into play. If you went to activate the high beams or the flash-to-pass (or just bumped it on accident and found out the hard way), it would blow both headlight fuses. Due to the relay alternating a wire other than the ground, it blows the fuses and leaves you with no lights. The simple solution I found to this problem:
Cut the wires that activate the high-beams and flash-to-pass until I can re-wire the relay and have it alternate the correct wire. Pulling the relay will stop the headlights from functioning altogether and is not an option.
SO, under the dashboard on the drivers side, you will look up and see a big grey and blue connector. There is a pink wire (don't worry its the only pink one in there) and a light blue/white wire (its a light blue wire with a white stripe) Those two wires are connected to the signal stalk and activate the high beams. Cut those two wired to disable all high-beam action, and you will not blow any fuses!
And thats all there is to it!:giggle: I still want to paint my brackets and get the relay wired correctly to enable the use of the high beams, but for now the most important thing is they work great and are better than the stock lights! Thanks for reading everyone and Happy Holidays!