
I have had some requests for tips on doing this. These were just my opinon and findings.
I had all my how to's saved back when I was concerned about loosing them.
I installed a set on my 06. They came on my 08 but I still removed the screws and used ant-seize on them.
I can't find where I put this on here, maybe in a reply. With this title maybe search will find it easier.
It might sound out of context because there were previous posts. I will try get time to edit it some.
You do not have to destroy the dash to get to the wires they tell you to find. You can find them easy by removing the center dash piece. Read the instructions carefully on the wire color code. The wires are to the right above the gas pedal. In fact other than installing the switch after you know where they are you don't need to go that far. I used heat shrink/crimp connectors with special crimp pliers.
I locktited the rivnuts in the roof so they would not spin if I had to remove the light bar. I did clean the screws and used copper anti-seize on them to mount it for ease of removal and a dab of silcone sealer on the roof. I used marine grade because it is more resilent in the sun. You will have to remove them to change bulbs and replace the windshield hopefully much later!
It is a nerve racking job to bore holes in your H3 roof!! Measure several times, throw away the template, have two other people look at it, wait a day and look again and eyeball align it. Haha mount one rivnut at a time, do not overtighten to the torque it says in the destructions. Turn them until tight and then "feel" torque. I got mine real tight but no where near the first one where I chickend out using an inch pound torque wrench and got scared to go to what they said. If you go much more than that the roof will pucker. Then "check your alignment each time." It can crawl on you if you don't use a center punch. NOT a hammer and punch a spring loaded one, titanium bits with starter tips work good. If you can find a metal drill bit stop put it on, tape may slip, you DO NOT want to spiral thread the bit into your headliner. A battery powered drill with a brake is the best control.
The newer part I got had a foam piece along the front edge which I think is the way they fixed the vibration.
You really need to spend some time adjusting how far forward you mount it to line up with the roof rails and maintain the same gap on each side. The lights adjust enough to raise them up even though it looks like being forward makes them aim down too low.
Taking the fuse box apart is a little intimidating as well. It needs to "snap" back to be fully engaged. Make SURE all the wires are where they will not get pinched when you reinsert the assembly.
Are you feeling brave??
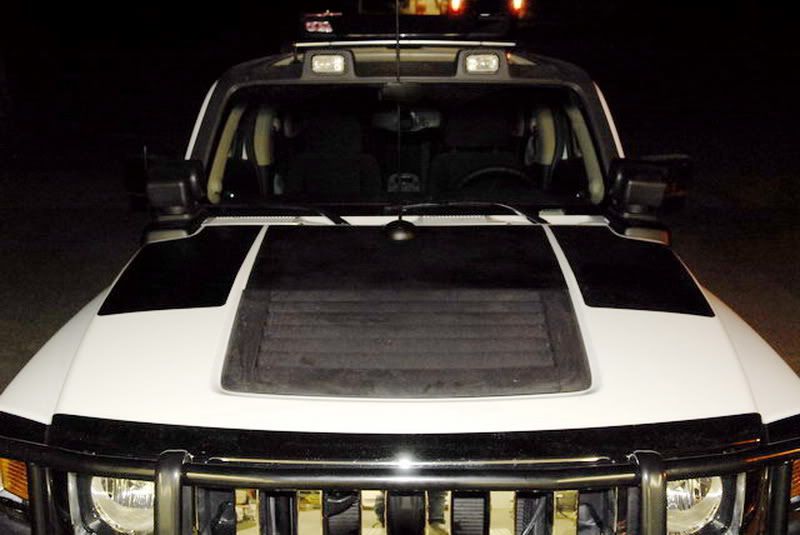
This was shot at 11:30 pm. The bright spots on the edge are my go lights.
I have to black out the hood for extended night runs because of glare on my white hood. Not wanting to paint it I used magnetic sheets to black it out when needed. You will also find the roof lights glare on the windshield and need some sort of shade on the bottom which I still have not made.

I had all my how to's saved back when I was concerned about loosing them.
I installed a set on my 06. They came on my 08 but I still removed the screws and used ant-seize on them.
I can't find where I put this on here, maybe in a reply. With this title maybe search will find it easier.
It might sound out of context because there were previous posts. I will try get time to edit it some.
You do not have to destroy the dash to get to the wires they tell you to find. You can find them easy by removing the center dash piece. Read the instructions carefully on the wire color code. The wires are to the right above the gas pedal. In fact other than installing the switch after you know where they are you don't need to go that far. I used heat shrink/crimp connectors with special crimp pliers.
I locktited the rivnuts in the roof so they would not spin if I had to remove the light bar. I did clean the screws and used copper anti-seize on them to mount it for ease of removal and a dab of silcone sealer on the roof. I used marine grade because it is more resilent in the sun. You will have to remove them to change bulbs and replace the windshield hopefully much later!
It is a nerve racking job to bore holes in your H3 roof!! Measure several times, throw away the template, have two other people look at it, wait a day and look again and eyeball align it. Haha mount one rivnut at a time, do not overtighten to the torque it says in the destructions. Turn them until tight and then "feel" torque. I got mine real tight but no where near the first one where I chickend out using an inch pound torque wrench and got scared to go to what they said. If you go much more than that the roof will pucker. Then "check your alignment each time." It can crawl on you if you don't use a center punch. NOT a hammer and punch a spring loaded one, titanium bits with starter tips work good. If you can find a metal drill bit stop put it on, tape may slip, you DO NOT want to spiral thread the bit into your headliner. A battery powered drill with a brake is the best control.
The newer part I got had a foam piece along the front edge which I think is the way they fixed the vibration.
You really need to spend some time adjusting how far forward you mount it to line up with the roof rails and maintain the same gap on each side. The lights adjust enough to raise them up even though it looks like being forward makes them aim down too low.
Taking the fuse box apart is a little intimidating as well. It needs to "snap" back to be fully engaged. Make SURE all the wires are where they will not get pinched when you reinsert the assembly.
Are you feeling brave??
This was shot at 11:30 pm. The bright spots on the edge are my go lights.
I have to black out the hood for extended night runs because of glare on my white hood. Not wanting to paint it I used magnetic sheets to black it out when needed. You will also find the roof lights glare on the windshield and need some sort of shade on the bottom which I still have not made.
