
-
Welcome to H4O! For a reduced ad experience, please login or register with the forum.
You are using an out of date browser. It may not display this or other websites correctly.
You should upgrade or use an alternative browser.
You should upgrade or use an alternative browser.
What did you do with your H3 recently? NEW
- Thread starter cgalpha08
- Start date
RamRod
Well-Known Member
- Messages
- 3,914
- Location
- AB, Canada
That is almost exactly what I had in mind! That looks great!!Ramrod,
That's more or less what I did. I haven't added a paddle style exterior handle yet, but that is in the plan. I found out the hardway that you need to keep the harness and switches plugged in, otherwise the other windows and locks don't work haha
Schwarttzy
Sponsor
- Messages
- 1,390
- Location
- Rockford IL

2nd Gen Rock Sliders H3 & H3T Hummer

2nd Gen Rock Sliders H3 & H3T Hummer
I’m excited to announce that 2nd Generation H3 Hummer Rock Sliders are nearly in production. The goal has to improve upon the design while addressing issues. The most important issue being ad…
Trash can brake job.
Since I bought the Hummer I knew the brakes needed some attention.
Removed the wheels, unbolted the calipers and removed the pads. Front caliper bracket bolts were rust welded in place and I ended up breaking two caliper bolts off. Removing the rotors was just as bad. PB Blaster didn't work. Couldn't use my BFH. Couldn't use my very BFH. Ended up using a combination of a very large puller and bolts screwed into the calipers. When the rotors finely broke loose it sounded like a gunshot. The parking brakes were also a mess. Looks like they have been sticking. The shoes came off in pieces. Got out the trash can and threw everything away. Installed new actuators, parking brake shoes and hardware, new front pads/rotors and new rear pads/rotors. I used GM/AC Delco parts. Buttoned it up and took it out to burnish the brakes.
This was one of the toughest brake jobs I've ever done. It looks like the previous owner{s} couldn't get the rotors off so they just installed new pads. Once, twice, who knows. The brakes are now back to factory fresh and the Hummer has better get up and go.
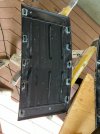
SAME!!! Sunroof leaks In AZ too! Detail shop supposedly cleared them twice. Fronts test drained fine, rears immediately over flowed.Noticed some moisture underneath my floor mats and some mild mold. Come to find out the carpet was soaked underneath on the passenger side.
First time sunroof drains have clogged, not very excited to pull the carpet to dry it out. Been doing some dusty trail lately, paired with all the rain AZ has been seeing must’ve been the perfect scenario for them to clog. Oh well.
Pulled down the headliner, and pulled the rear wheel wells. driver side drain plug at the wheel well wasn’t pushed all the way through and was punched shut. Pulled it out opened it up more and snaked it with a long camel bak brush; tons of stinky black muck came out. Obviously not recent muck. Same on passenger side.
Took off the rear drain trays where the tube connects to the sunroof tray.
Later,
Matt
I REPLACED MINE WITH HIGH PERFORMANCE PARTS EVEN THE HOSESTrash can brake job.
Since I bought the Hummer I knew the brakes needed some attention.
Removed the wheels, unbolted the calipers and removed the pads. Front caliper bracket bolts were rust welded in place and I ended up breaking two caliper bolts off. Removing the rotors was just as bad. PB Blaster didn't work. Couldn't use my BFH. Couldn't use my very BFH. Ended up using a combination of a very large puller and bolts screwed into the calipers. When the rotors finely broke loose it sounded like a gunshot. The parking brakes were also a mess. Looks like they have been sticking. The shoes came off in pieces. Got out the trash can and threw everything away. Installed new actuators, parking brake shoes and hardware, new front pads/rotors and new rear pads/rotors. I used GM/AC Delco parts. Buttoned it up and took it out to burnish the brakes.
This was one of the toughest brake jobs I've ever done. It looks like the previous owner{s} couldn't get the rotors off so they just installed new pads. Once, twice, who knows. The brakes are now back to factory fresh and the Hummer has better get up and go.
View attachment 31464
Wow! I don't think I've ever seen brakes in that bad of condition. Amazing that it even moved (or stopped). Glad I live in sunny SoCal (although we've got blizzard conditions currently).Trash can brake job.
Since I bought the Hummer I knew the brakes needed some attention.
Removed the wheels, unbolted the calipers and removed the pads. Front caliper bracket bolts were rust welded in place and I ended up breaking two caliper bolts off. Removing the rotors was just as bad. PB Blaster didn't work. Couldn't use my BFH. Couldn't use my very BFH. Ended up using a combination of a very large puller and bolts screwed into the calipers. When the rotors finely broke loose it sounded like a gunshot. The parking brakes were also a mess. Looks like they have been sticking. The shoes came off in pieces. Got out the trash can and threw everything away. Installed new actuators, parking brake shoes and hardware, new front pads/rotors and new rear pads/rotors. I used GM/AC Delco parts. Buttoned it up and took it out to burnish the brakes.
This was one of the toughest brake jobs I've ever done. It looks like the previous owner{s} couldn't get the rotors off so they just installed new pads. Once, twice, who knows. The brakes are now back to factory fresh and the Hummer has better get up and go.
View attachment 31464
Hello Aspen.I REPLACED MINE WITH HIGH PERFORMANCE PARTS EVEN THE HOSES
I looked at the high performance parts but went with GM/ACDelco parts instead. After I burnished the brakes I had a small white car pull out in front of me. I stood on the brakes and thank goodness no paint was swapped. I'm sure the small car had to have the seats cleaned but I'm happy with the brake performance.
OEM vs. High Performance? It would be interesting to see how they compare against each other. Side by side, real world stuff. Not numbers on a piece of paper.
Hello 650Hawk,Wow! I don't think I've ever seen brakes in that bad of condition. Amazing that it even moved (or stopped). Glad I live in sunny SoCal (although we've got blizzard conditions currently).
Surprisingly the brakes were good. The brake pedal didn't sink or fade. The Hummer pulled slightly to the left but still had decent stopping power. It wasn't until I changed them that that I found out what a mess they were.
EndeavoredH3
Well-Known Member
- Messages
- 469
- Location
- Arizona
I put the battery on a trickle charger today.
08H3
Well-Known Member
- Messages
- 1,367
- Location
- United States
Replaced ignition switch in the camo H3. It was not a good couple weeks for Hummers in our house. The white one was down with an electrical issue. Then, while it was apart in the garage, the camo one left us momentarily stranded 50 miles away. I was in the parking lot with the hood up (always embarrassing) checking fuses, swapping relays, etc. It started after about 10 minutes of me fiddling with it. Strange thing was, I didn't get a Passlock light on the DIC. Sure enough, that solved it though. No life changing tip, but the top Philips screw on the switch is hard to get to. When you change it out, put in socket head screws. Makes it really easy to reinstall, and if you ever have to change it again, get back out.
zebra
Well-Known Member
- Messages
- 199
- Location
- cold & windy
reckon i shoulda mentioned last week's fun in this thread
stuck slave cylinder?
anybody ever have a slave cylinder stick in the extended position? it's been negative outside the last couple days, and when my wife went to work this morning, she called right back saying she got stuck because the transmission was tough to shift in/out of gear. as i drove to get her, i was...
hummer4x4offroad.com
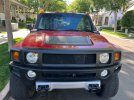
Freshening up the trim. The youngest boy wanted to do this. Raptor Bed Liner for everything.
Custom grill was peeling pretty bad so we ground out the bad spots and re-faired it nice and smooth.

Hood louvers were a Pita stupid design fixed with urethane windshield glue. Epoxied all the original fasteners back in place. Have the glue too.

Did the fake air intakes, Roof brow and A-pillar trim, rear bumper outer trim, and gas’s fill tub. Lots and lots of prep work!!! Looks really good. Need a new key for the roof rack to get the rest off and finish the job. Putting it back on in the AM.


Had to move them to the porch because it threatened to sprinkle. Sprayed them I the rocks out back.
Later,
Matt
Custom grill was peeling pretty bad so we ground out the bad spots and re-faired it nice and smooth.
Hood louvers were a Pita stupid design fixed with urethane windshield glue. Epoxied all the original fasteners back in place. Have the glue too.
Did the fake air intakes, Roof brow and A-pillar trim, rear bumper outer trim, and gas’s fill tub. Lots and lots of prep work!!! Looks really good. Need a new key for the roof rack to get the rest off and finish the job. Putting it back on in the AM.
Had to move them to the porch because it threatened to sprinkle. Sprayed them I the rocks out back.
Later,
Matt
Attachments
Nikal
Well-Known Member
- Messages
- 92
- Location
- California
What type of paint did you use to paint all the plastics? And how did you apply? Spray gun or is that a spray can?
Raptor Bed Liner
This is the stuff we used. Test sprayed the back sides to get the technique and distances right. Lots of very careful prep work. The kit came from Amazon, came with the sprayer we used it at about 60 psi. It’s pretty much just a cheap undercoating Gun. Per the videos you can reduce it 20% and use an HVLP sprayer for a smoother look. I think you can clear coat over it as well.
One of the main reasons we did this was to toughen up those trim panels. They were getting really sun damaged and brittle. I figure this stuff will help them live a bit longer.
Really it went on pretty easy. We think the textured look came out really well.
Good luck!!!
Matt
zebra
Well-Known Member
- Messages
- 199
- Location
- cold & windy
but you push the hood open toward the windshield...
") YMMV.
YMMV.rascole
Well-Known Member
- Messages
- 2,823
- Location
- Bellflower, CA
I have used the Raptor liner for several projects. It is very forgiving and far tougher than paint. I reduced it 20% for a smoother finish.Raptor Bed Liner
This is the stuff we used. Test sprayed the back sides to get the technique and distances right. Lots of very careful prep work. The kit came from Amazon, came with the sprayer we used it at about 60 psi. It’s pretty much just a cheap undercoating Gun. Per the videos you can reduce it 20% and use an HVLP sprayer for a smoother look. I think you can clear coat over it as well.
One of the main reasons we did this was to toughen up those trim panels. They were getting really sun damaged and brittle. I figure this stuff will help them live a bit longer.
Really it went on pretty easy. We think the textured look came out really well.
Good luck!!!
Matt
Alpha X
Well-Known Member
- Messages
- 451
- Location
- The Motor City
I'm interested in seeing a picture of this custom grille installed after raptor liner. I'm curious how it was made. Any photos of the back of it?
H3Hummer
Well-Known Member
- Messages
- 700
- Location
- LUXEMBOURG in EU
Here is mine, when i did the raptor front and rear to


Some mostly finished pics. Need more hole plugs for the top roof brow panel. We like it. Need to find the right metal mesh to match the grill and bumper openings. Seems like the side plastics on the roof have shrunk and pulled rearward cracking the front attachment points. The AZ sun is brutal on plastics. More work in the following weeks.
Later,
Matt
Attachments
-
 1C3A6382-3B1B-4901-8105-E08FB5F65692.jpeg138.7 KB · Views: 527
 -
 939F1EC7-A366-4590-88EC-1E88FBE4CE89.jpeg153.6 KB · Views: 544
 -
 D471B2BE-E6B8-4354-A7AA-24D47A2530FB.jpeg167.5 KB · Views: 589
 -
 5C32C427-A748-4600-AEC3-1649C9D5D495.jpeg141.3 KB · Views: 578
 -
 B67F2649-95D7-4CD5-9CF0-556F3FD7FCC4.jpeg182.9 KB · Views: 523
 -
 F195B7EF-6939-4357-9554-3DBDAFA3454A.jpeg132.3 KB · Views: 564
EndeavoredH3
Well-Known Member
- Messages
- 469
- Location
- Arizona
Interior tear down and carpet removal. Cleared out all 4 sunroof drains and now time to wash the carpet and get it smelling not so musty. Also found the dealership keychain tag that was sold with the h3 back in 07’
Sunroof seal on order, Az was hard on the original. But can’t complain after 16 years of use


Sunroof seal on order, Az was hard on the original. But can’t complain after 16 years of use