
08H3
Well-Known Member
- Messages
- 1,370
- Location
- United States
UPDATE 8/27/2012 -- Sunroof drains
UPDATE: We had a pretty good rainstorm and my wife found out when she went to work that the sunroof had leaked again. I had cleaned the front and had hoped that the rear drains were not plugged. Well, they were. According to the service manual, the rear drain maintenance is a huge project that involves dropping the headliner. I was NOT going to do this if I could find any alternative. Luckily, I did. If you remove the side panel trim (upper and lower) from the back, you can access the lower end of the drains. I removed them (similar plug to fronts), and again opened up the hole and cleaned out the gunk. While not ideal since you are pushing any obstruction the "wrong" way, I used air and a snake from the lower end to open them back up. All is well now....I hope. Sorry there are no pictures, but I wasn't in the mood to make this a photo shoot. I just wanted to get it done.
******
Unless you just have an unbelievable amount of time to waste and enjoy contorting your wrists in about seven different ways that God didn't intend just so you can loosen a 5 cent connector two feet up under your dash, KEEP YOUR SUNROOF DRAINS CLEAR!!! I didn't and paid my price. Here's what little I can share to make the job a little more bearable.
I'll start from the END first. This glob of stuff that looks like dog crap is the slug of gunk that came out of my sunroof drain. Not shown is the sand and rock that also plugged the far end.

First, I was terrified of accidentally disconnecting a hose somewhere when attempting to blow the junk out, so to reduce, though probably not eliminate the risk, I catheterized the sunroof opening first with a piece of silicone tubing that had roughly the same O.D. as the drain's I.D.

Compressed air didn't work for me, even up to 100PSI (note: I wouldn't have tried 100PSI without the silicone hose inserted into the drains. Serivce manual says 35PSI or less). Next thought was that I could snake it out using a piece of steel cable. No such luck. If all you had was dirt, I'm sure this would have worked great, but as I later found out I was pushing on a rock at the bottom.

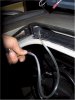
Not really many pictures of removing the lower end, but you need to find where the drains exit through the firewall. On the driver's side, you are looking for a black semi rigid line that plugs into a rubber fitting as shown below. Passenger side tube was white. On the driver's side, if you're scrawny like me, you can reach up far enough and just pull the connector out of the firewall. If you're at all in shape and have anything resembling arm muscles, you'll probably never be able to fit your hand up in there. Only time in my life being a wimp has come in handy!
Once that's disconnected, use your air or snake to clear it. On the passenger side, you'll need to lower the glove compartment, remove the end panel from the dash and the HVAC vent. Then it's just a matter of getting pack there to pull the fitting out of the firewall.
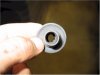
The picture below shows the factory plug. I have absolutely no idea why it's designed this way, but most of the exit is closed off with only a small "X" shape cut into it. This design makes it great at catching any gunk that does find its way into the drain instead of it just passing through.

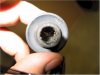
While it's out, remove the extra material as shown below to open up the exit. Hopefully that will help in the future. It doesn't have to be pretty. Just use whatever it takes to open it up.

Avoid all this and just make sure you keep the sunroof area clean. Better yet, delete that option on your next vehicle. Unfortunately I had to order the sunroof as part of a compromise with my wife. She got leather and sunroof, I got the offroad package and 5-speed.
UPDATE: We had a pretty good rainstorm and my wife found out when she went to work that the sunroof had leaked again. I had cleaned the front and had hoped that the rear drains were not plugged. Well, they were. According to the service manual, the rear drain maintenance is a huge project that involves dropping the headliner. I was NOT going to do this if I could find any alternative. Luckily, I did. If you remove the side panel trim (upper and lower) from the back, you can access the lower end of the drains. I removed them (similar plug to fronts), and again opened up the hole and cleaned out the gunk. While not ideal since you are pushing any obstruction the "wrong" way, I used air and a snake from the lower end to open them back up. All is well now....I hope. Sorry there are no pictures, but I wasn't in the mood to make this a photo shoot. I just wanted to get it done.
******
Unless you just have an unbelievable amount of time to waste and enjoy contorting your wrists in about seven different ways that God didn't intend just so you can loosen a 5 cent connector two feet up under your dash, KEEP YOUR SUNROOF DRAINS CLEAR!!! I didn't and paid my price. Here's what little I can share to make the job a little more bearable.
I'll start from the END first. This glob of stuff that looks like dog crap is the slug of gunk that came out of my sunroof drain. Not shown is the sand and rock that also plugged the far end.
First, I was terrified of accidentally disconnecting a hose somewhere when attempting to blow the junk out, so to reduce, though probably not eliminate the risk, I catheterized the sunroof opening first with a piece of silicone tubing that had roughly the same O.D. as the drain's I.D.
Compressed air didn't work for me, even up to 100PSI (note: I wouldn't have tried 100PSI without the silicone hose inserted into the drains. Serivce manual says 35PSI or less). Next thought was that I could snake it out using a piece of steel cable. No such luck. If all you had was dirt, I'm sure this would have worked great, but as I later found out I was pushing on a rock at the bottom.
Not really many pictures of removing the lower end, but you need to find where the drains exit through the firewall. On the driver's side, you are looking for a black semi rigid line that plugs into a rubber fitting as shown below. Passenger side tube was white. On the driver's side, if you're scrawny like me, you can reach up far enough and just pull the connector out of the firewall. If you're at all in shape and have anything resembling arm muscles, you'll probably never be able to fit your hand up in there. Only time in my life being a wimp has come in handy!
Once that's disconnected, use your air or snake to clear it. On the passenger side, you'll need to lower the glove compartment, remove the end panel from the dash and the HVAC vent. Then it's just a matter of getting pack there to pull the fitting out of the firewall.
The picture below shows the factory plug. I have absolutely no idea why it's designed this way, but most of the exit is closed off with only a small "X" shape cut into it. This design makes it great at catching any gunk that does find its way into the drain instead of it just passing through.
While it's out, remove the extra material as shown below to open up the exit. Hopefully that will help in the future. It doesn't have to be pretty. Just use whatever it takes to open it up.
Avoid all this and just make sure you keep the sunroof area clean. Better yet, delete that option on your next vehicle. Unfortunately I had to order the sunroof as part of a compromise with my wife. She got leather and sunroof, I got the offroad package and 5-speed.
Attachments
Last edited:


