• Welcome to H4O! For a reduced ad experience, please login or register with the forum.

H2 Front Winch Bumper and 15000lbs Winch Install

Polar Bear

Well-Known Member
Messages
83
Location
Montreal
So I got feed up hauling the winch cradle from the front of my H2 to the rear and I wanted a much more powerful winch that would better match the weight of my H2.

And honestly...I was feed up having to pull the winch cradle out just to be able to open the hood! And while it never happened...what if I needed to open the hood with the winch in place and under tension...not going to happen!

So I looked at every bumper from Road Armor to Iron Bull to you name it and I decided...I will simply build my own.

I did this in April of 2013...I am so glad I did it! One of the best mods I have done on my Deuce!


Here are the first pics of the bumper as it is stock with the receiver mount.

attachment.php


attachment.php


attachment.php


attachment.php


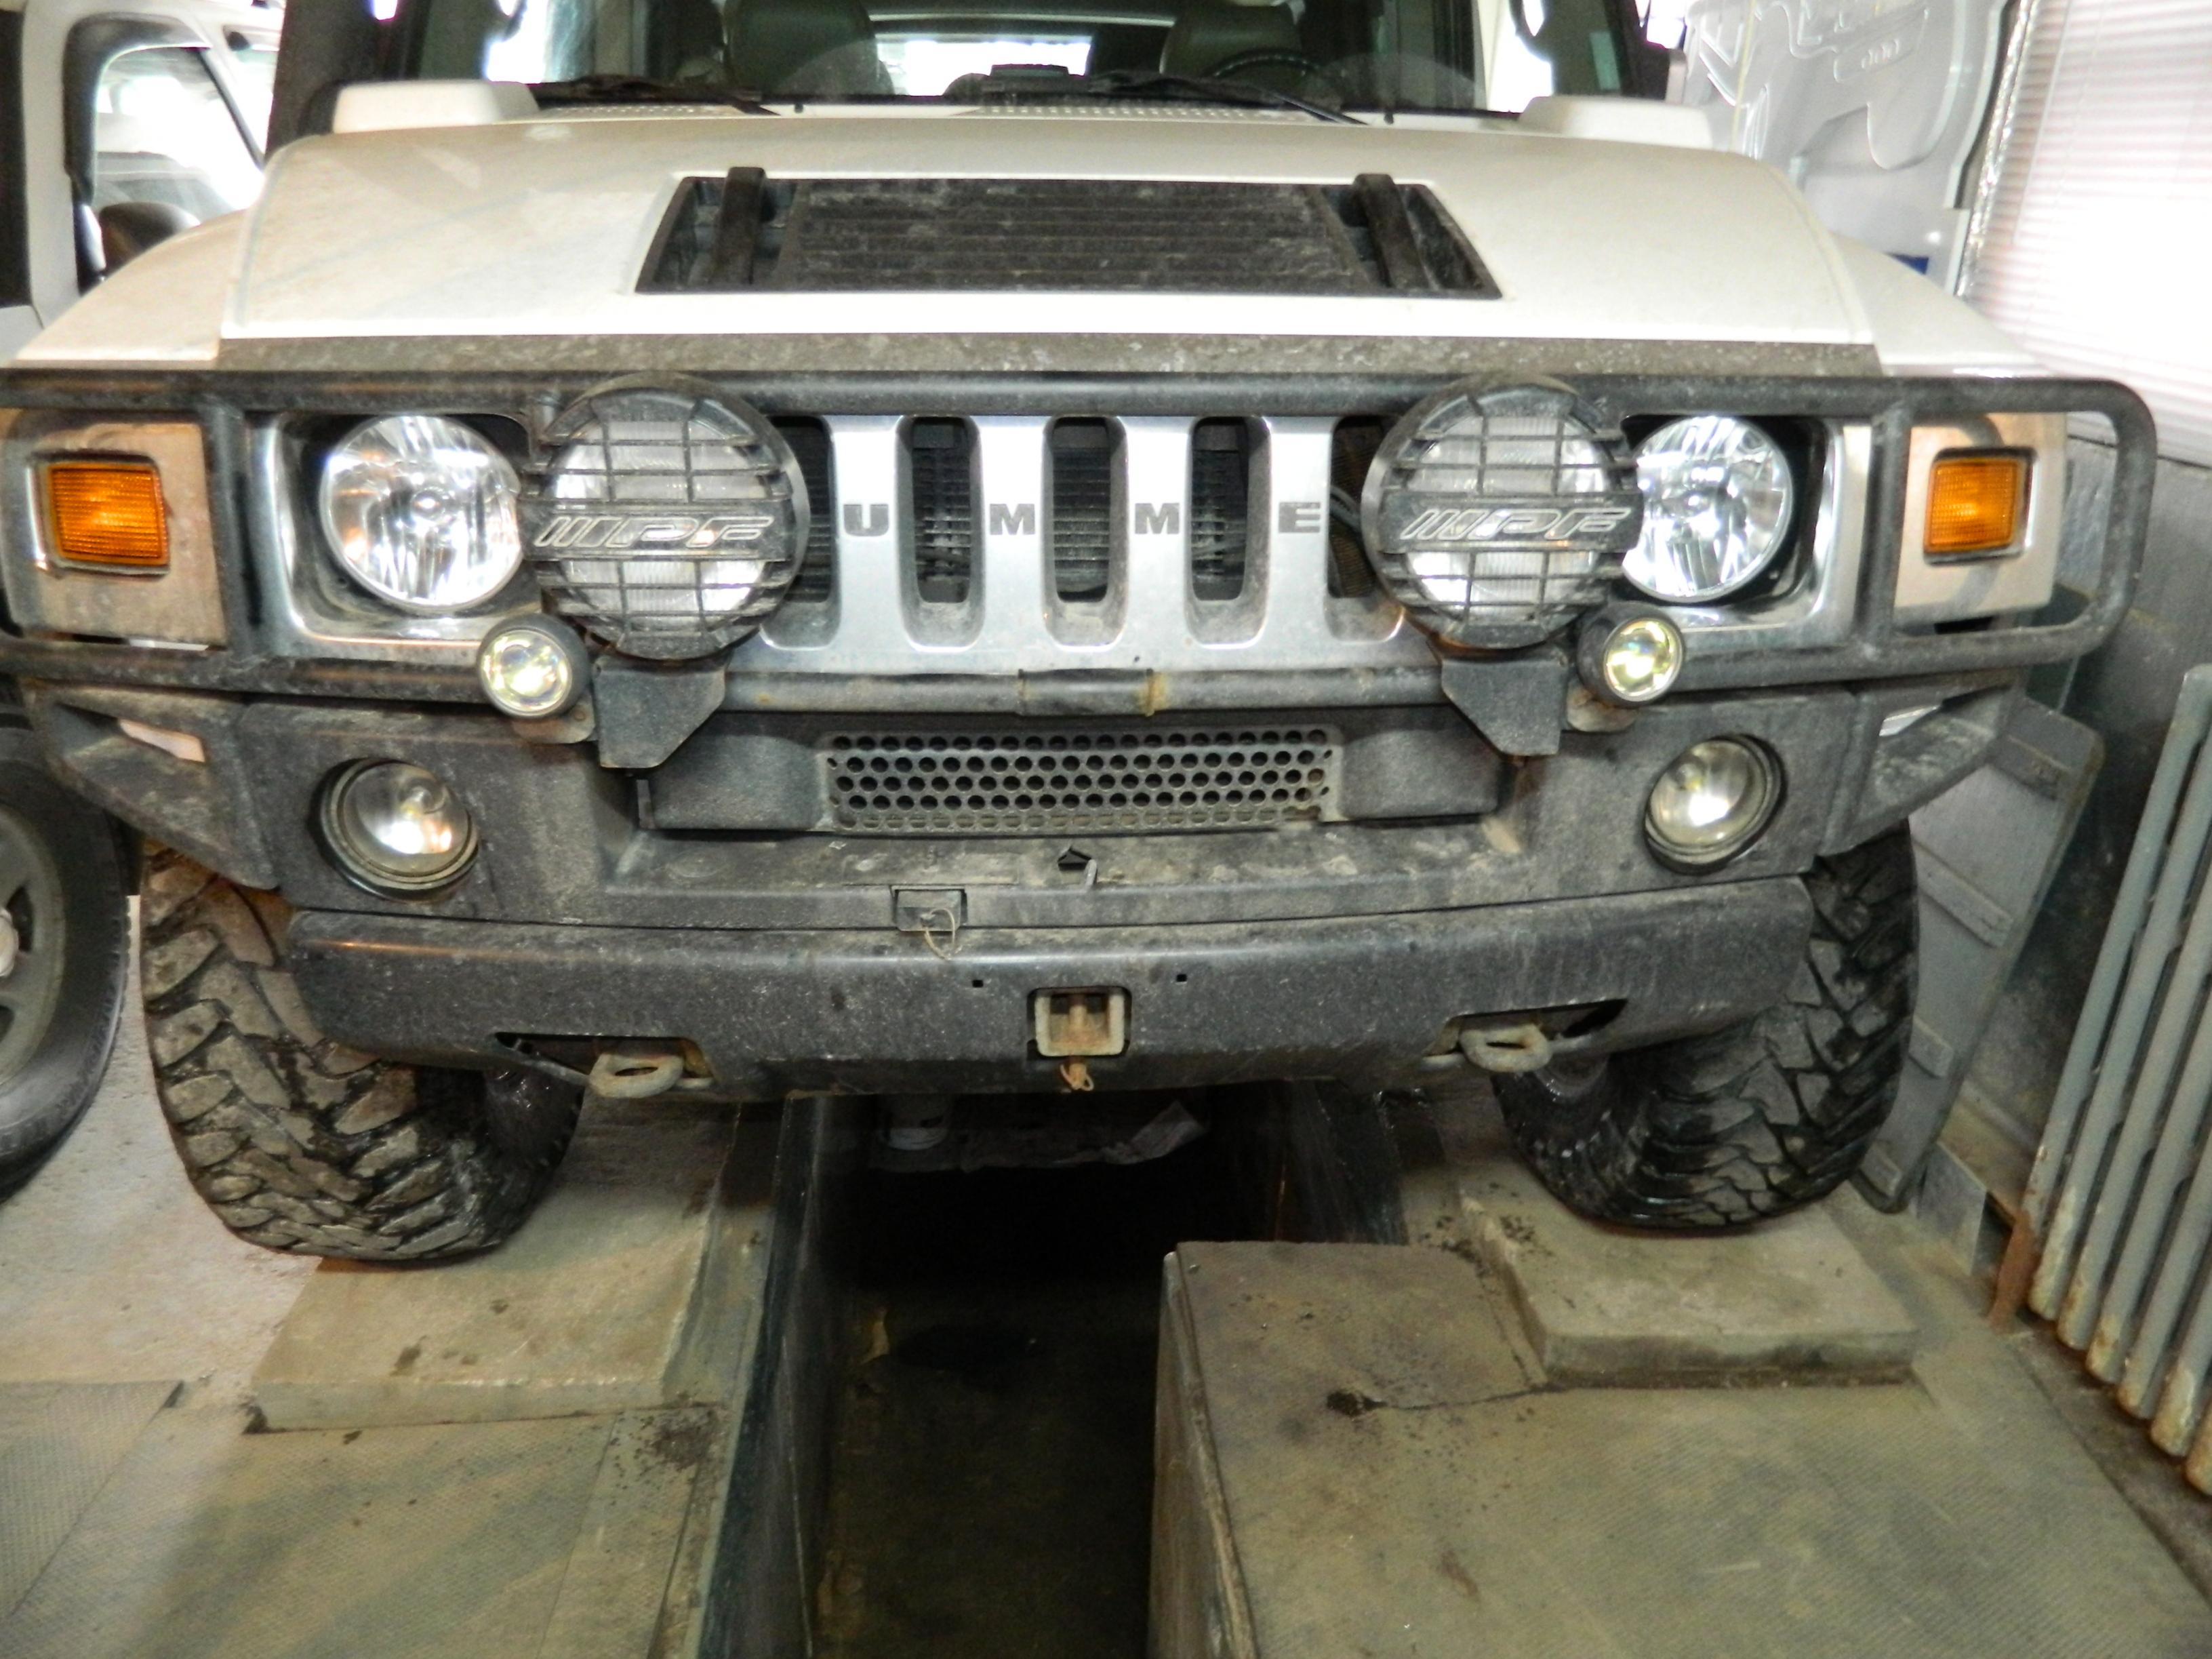
Here is the front frame with the bumper removed and the receiver exposed.

attachment.php


attachment.php


attachment.php


attachment.php


Here is a test fit of the winch mount that I had started to make about 2 years ago for a smaller 12000lbs winch.

attachment.php


attachment.php


One thing I already noticed is that I will need to completely change my initial idea. While I did want it tucked up as high as possible, the new 15000lbs winch requires me to drop the winch down lower on the frame both for clearance and strength of mounting. A standard 12000lbs winch is only 6 inches wide, this mighty 15000lbs winch is 8 inches wide and requires not a mere 4 bolts to hold it down but 8! So I will need to carefully plot out the new mounting holes to allow me to have the right pattern and strength.

The winch I will be using is the Smittybilt 15000lbs X2O, I want to be sure if I am stuck in the mud and I need to pull myself or several trucks out at a time it will be a breeze. Is it overkill...not really my H2 weighs just shy of 9000lbs!

Stay Tuned!


Attachments

  • DSCN3559.jpg
    DSCN3559.jpg
    739.4 KB · Views: 5,215
  • DSCN3558.jpg
    DSCN3558.jpg
    663.9 KB · Views: 5,579
  • DSCN3557.jpg
    DSCN3557.jpg
    704.6 KB · Views: 5,524
  • DSCN3556.jpg
    DSCN3556.jpg
    695.9 KB · Views: 12,259
  • DSCN3560.jpg
    DSCN3560.jpg
    689.9 KB · Views: 7,275
  • DSCN3561.jpg
    DSCN3561.jpg
    695.1 KB · Views: 5,481
  • DSCN3562.jpg
    DSCN3562.jpg
    662.3 KB · Views: 5,291
  • DSCN3563.jpg
    DSCN3563.jpg
    704.1 KB · Views: 5,218
  • DSCN3566.jpg
    DSCN3566.jpg
    745.3 KB · Views: 5,356
  • DSCN3565.jpg
    DSCN3565.jpg
    580.5 KB · Views: 5,389

Polar Bear

Well-Known Member
Messages
83
Location
Montreal
I had to make some changes since the Smittybilt 15000lbs winch is a tad bigger than I had anticipated!

I also decided to make some areodynamic upgrades which should help with fuel economy and should help in deeper mud and water crossings.

I also had an old H1 stock non winch bumper lying around and since everyone says my H2 is more H1 than H2...I figure why not find a way to integrate H1 onto my H2.

Here you see the stock H1 non winch bumper...before the cutting begins!

attachment.php


Here is stage one after cutting the ears off the bumper...I will save those for later!

attachment.php


Now since this piece is going to be placed over my other winch plate I needed to modify the placement of the holes.


attachment.php


attachment.php


attachment.php


attachment.php


So now Stage 1 of my New Winch plate is done!
 

Attachments

  • DSCN3594.jpg
    DSCN3594.jpg
    637.7 KB · Views: 4,755
  • DSCN3595.jpg
    DSCN3595.jpg
    648.1 KB · Views: 4,715
  • DSCN3596.jpg
    DSCN3596.jpg
    635.5 KB · Views: 4,715
  • DSCN3597.jpg
    DSCN3597.jpg
    639.7 KB · Views: 4,695
  • DSCN3605.jpg
    DSCN3605.jpg
    655.3 KB · Views: 4,676
  • DSCN3604.jpg
    DSCN3604.jpg
    745.2 KB · Views: 1,554
  • DSCN3603.jpg
    DSCN3603.jpg
    641.1 KB · Views: 4,706

Polar Bear

Well-Known Member
Messages
83
Location
Montreal
This is what I decided to do with the ears I cut off earlier.

I am All for Reducing, Reusing and Recylcing...Especially Hummer H1 Parts!

C'mon What Hummer H2 or H3 owner doesn't want to be able to say that they have H1 parts on their Hummer! So in an effort to provide some style and some aerodynamics Here is what I did with the "Spare Parts"

attachment.php


attachment.php


attachment.php


attachment.php


attachment.php
attachment.php
attachment.php


attachment.php
 

Attachments

  • DSCN3606.jpg
    DSCN3606.jpg
    690.8 KB · Views: 4,388
  • DSCN3607.jpg
    DSCN3607.jpg
    609.5 KB · Views: 4,345
  • DSCN3608.jpg
    DSCN3608.jpg
    586.2 KB · Views: 4,393
  • DSCN3609.jpg
    DSCN3609.jpg
    585 KB · Views: 4,321
  • DSCN3613.jpg
    DSCN3613.jpg
    640.1 KB · Views: 4,372
  • DSCN3612.jpg
    DSCN3612.jpg
    743.7 KB · Views: 4,480
  • DSCN3611.jpg
    DSCN3611.jpg
    755.1 KB · Views: 4,516
  • DSCN3610.jpg
    DSCN3610.jpg
    606 KB · Views: 4,407

Polar Bear

Well-Known Member
Messages
83
Location
Montreal
While mine does look similar...definitely not the same! Yours is bolted in and has an amazing approach angle and is tucked nicely into the truck...I could not do that and still get the Massive 15000lbs winch to fit...So here is the rest of the install!
 

Polar Bear

Well-Known Member
Messages
83
Location
Montreal
Since I am installing a massive winch...I decided to add some extra gussets just to prevent twisting under heavy side angle pulls. You will also notice that I have removed my OEM tow hooks...I have integrated some shackle mounts into my new design. For the OEM ones I cut them flush with the edge of the bumper and then reinstalled them with the factory hardware to help maintain strength in the frame rails.

attachment.php


attachment.php


attachment.php


attachment.php


I did a quick test fit to get an idea for plate alignment and so I could take measure for the side plates.

The shackle mounts you see are bolted in with 2 3/8" x 1" Grade 8 bolts and them I welded them!

For the roller fairlead I tack welded them in place so that I would not have to try and hold a wrench on the inside edge once the winch was install...it is going to be very tight!
 

Attachments

  • DSCN3614.jpg
    DSCN3614.jpg
    736.4 KB · Views: 4,346
  • DSCN3616.jpg
    DSCN3616.jpg
    674.5 KB · Views: 4,075
  • DSCN3618.jpg
    DSCN3618.jpg
    718.9 KB · Views: 4,279
  • DSCN3619.jpg
    DSCN3619.jpg
    709.4 KB · Views: 4,254

Polar Bear

Well-Known Member
Messages
83
Location
Montreal
Now the fun begins!

In order for the new massive winch to fit low enough in the frame I had to cut the factory "Bolt-In" bracket and reshape it. I did manage to use it for support. I also added in one piece of 1/4" plate on each side.

attachment.php


attachment.php


attachment.php


attachment.php
 

Attachments

  • DSCN3624.jpg
    DSCN3624.jpg
    735.8 KB · Views: 3,915
  • DSCN3623.jpg
    DSCN3623.jpg
    754.3 KB · Views: 3,941
  • DSCN3622.jpg
    DSCN3622.jpg
    728.4 KB · Views: 3,978
  • DSCN3620.jpg
    DSCN3620.jpg
    685.3 KB · Views: 4,052

Polar Bear

Well-Known Member
Messages
83
Location
Montreal
Next I decide to fill in the OEM tow hook pockets in my original bumper.


attachment.php


attachment.php


I did a quick test fit after cutting the bumper to fit over the new plate...just to make sure everything was good before I started the final welds!

attachment.php


attachment.php
attachment.php
 

Attachments

  • DSCN3636.jpg
    DSCN3636.jpg
    684.7 KB · Views: 3,971
  • DSCN3637.jpg
    DSCN3637.jpg
    659.5 KB · Views: 3,876
  • DSCN3644.jpg
    DSCN3644.jpg
    636.7 KB · Views: 3,921
  • DSCN3643.jpg
    DSCN3643.jpg
    668.7 KB · Views: 4,109
  • DSCN3647.jpg
    DSCN3647.jpg
    600.4 KB · Views: 3,836

Polar Bear

Well-Known Member
Messages
83
Location
Montreal
Now that I know it would all fit, I proceeded to the final welding.

This is a very long process to make sure you don't overheat the frame you have to do a bit then move to the other side etc. so lots of time on this step. I added lots of braces to ensure strength under heavy pulls!

attachment.php


attachment.php


attachment.php


attachment.php


attachment.php


attachment.php


attachment.php


attachment.php


attachment.php


attachment.php
 

Attachments

  • DSCN3654.jpg
    DSCN3654.jpg
    747.3 KB · Views: 3,742
  • DSCN3655.jpg
    DSCN3655.jpg
    615.4 KB · Views: 3,704
  • DSCN3657.jpg
    DSCN3657.jpg
    658.7 KB · Views: 3,631
  • DSCN3656.jpg
    DSCN3656.jpg
    603.9 KB · Views: 3,690
  • DSCN3660.jpg
    DSCN3660.jpg
    753.8 KB · Views: 3,728
  • DSCN3659.jpg
    DSCN3659.jpg
    623.4 KB · Views: 3,769
  • DSCN3658.jpg
    DSCN3658.jpg
    692.2 KB · Views: 3,739
  • DSCN3661.jpg
    DSCN3661.jpg
    744.6 KB · Views: 3,696
  • DSCN3662.jpg
    DSCN3662.jpg
    715.3 KB · Views: 3,693
  • DSCN3663.jpg
    DSCN3663.jpg
    671.4 KB · Views: 3,762

Polar Bear

Well-Known Member
Messages
83
Location
Montreal
The final stages!!

With all the welding done, I applied several coats of Gravel Guard/Bedliner Coating to ensure a durable finish.

attachment.php


attachment.php


Here is my new Massive SmittyBilt 15000lbs capacity winch! This one has a 7.0hp motor and 520:1 ratio...so no it is not the fastest BUT man can it ever pull!!!

attachment.php


attachment.php
 

Attachments

  • DSCN3670.jpg
    DSCN3670.jpg
    698.9 KB · Views: 3,432
  • DSCN3669.jpg
    DSCN3669.jpg
    740.3 KB · Views: 3,372
  • DSCN3668.jpg
    DSCN3668.jpg
    735.2 KB · Views: 3,476
  • DSCN3666.jpg
    DSCN3666.jpg
    750.7 KB · Views: 3,551

Polar Bear

Well-Known Member
Messages
83
Location
Montreal
So here is the finished product!!

I think it turned out great! And with 2 years of abuse on it so far and I am still very very pleased!

And yes I had to butter the winch to get it to "slide" into the hole....really really tight fit!


attachment.php


attachment.php


attachment.php


So As you can see, I do have WAY better approach angle than with the stock receiver style winch. I can actually open my hood whenever I want to without having to remove something first and I have a 15000lbs capacity winch on my H2!!!
 

Attachments

  • DSCN3677.jpg
    DSCN3677.jpg
    620.9 KB · Views: 3,416
  • DSCN3676.jpg
    DSCN3676.jpg
    698.2 KB · Views: 3,827
  • DSCN3674.jpg
    DSCN3674.jpg
    606.9 KB · Views: 3,466

RamRod

Well-Known Member
Messages
3,914
Location
AB, Canada
Pics in the last two post arnt working for me.

Sure beats having the hitch reciever setup I'm sure!

I wouldn't put much trust into those two hooks you added though, personally would have stuck with the factory ones. Sure they may work for a few pulls but it's only a matter of time before those tiny welds fail, lets face it they arnt exactly weldporn quality (don't worry I have similar welds), plus the metal they are welded to isn't very thick either and doesn't look too reinforced. When most people and shops add those type of hooks you will usually see them added from the rear with some overlap and act as a gusset to the surface they are being added to which is also about 2-3 times as thick....

Winching and recovery gear is an area I am a big stickler in, its the most dangerous part of our hobby and as a career Risk Manager I have seen too many photo's of people getting seriously hurt or killed due to poor recovery techniques, or improper setups (oil and gas industry is full of examples unfortunatly). Just my two cents
 

Polar Bear

Well-Known Member
Messages
83
Location
Montreal
So far they have held up great after 2 years of heavy pulls. The plate they are attached to is actually 7/16inch thick. The top edge is not the same thickness as the base area. As well, they are drill and tapped and bolted with 2 Grade 8 bolts each Then I made a deep chamfer around the edges and welded them in. They are super strong and I am not worried in the least! I always try and overbuild everything I make just to be safe!
 

RamRod

Well-Known Member
Messages
3,914
Location
AB, Canada
So far they have held up great after 2 years of heavy pulls. The plate they are attached to is actually 7/16inch thick. The top edge is not the same thickness as the base area. As well, they are drill and tapped and bolted with 2 Grade 8 bolts each Then I made a deep chamfer around the edges and welded them in. They are super strong and I am not worried in the least! I always try and overbuild everything I make just to be safe!
Oh okay good! Sounds like there I'd more than what meets the eye then!
 
Top