• Welcome to H4O! For a reduced ad experience, please login or register with the forum.

Installed a bodylift

Reloader

Well-Known Member
Messages
413
Location
Montana a free state
I installed a Daystar 1 inch body lift this weekend along with a set of Bilstien 5100 shocks. Install went pretty quick and easy. A couple of the body mount sleeves were siezed on the old bolts. Nothing Mr air hammer couldn't fix. Had to raise the brake line mount on the rear diff. This was due to the Bilstiens being longer and allowing the rear axle to hang lower while on the lift. The rubber hoses were stretched fairly tight. Only wiring issue was the lines to the fog lights . Easily fixed as there was extra slack taped into the wires. I trimmed the lower fan shroud per the instructions and reinstalled. Found lots of dirt caked on the back side of the radiator near the corners. Probably that crap from the Cliffs offroad park. That stuff got in everywhere. Anyway, there is only about 1/4 inch of fan to shroud clearance on the bottom. Has anyone who has this set up experienced any interference in this area? I believe its normal for the engine to torque to the right when put under load. There was an extra rad hose bracket in the kit to reinforce the lower hose mount location but the hose appears real close to the fan.
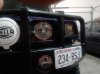
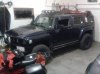
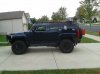
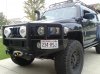
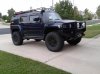
Anyway the truck looks good . There is a fair sized gap between the grill and the bumper. I think I'll just flat black the sheet metal under the headlights. So far I really like the Bilstiens. I think I need to order the extended bumpstops though. Any one know a good source for extended rear brake hoses?
 

Neo

Badfish
Messages
1,669
Location
Brookings, OR
the guys that just did and are doing springovers should be able to help with the brake lines . after the bumpstops , sounds like you got just about all the bases covered . just wheel lite at first then progress to tougher stuff flex and see if you here the fan kissin , but you know all that :wink:. maybe just crawl some curbs and stuff first with one tire at a time then the other side . then get one front tire on a big rock thats tall enough to put the other in the air , then the same with the other wheel .
 

06 H3

a.k.a. "The Jackal"
Messages
9,506
Location
Meridian, ID
Hey reloader! Hope you and your wife are doing well. I gotta get back to Moab and hangout with you guys.

When I did my spring over I ordered crown performance brakelines. bebe and 4speedfunk used them. Google them and look for their phone number the H3 lines arent on the site but they can make any length if u wanna be flexy lol
 

Reloader

Well-Known Member
Messages
413
Location
Montana a free state
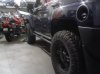
Here are some pics taken in the garage. I'll get better ones tomorrow outside. 20120916_233944-1.jpg20120916_233916.jpg

20120916_234037.jpg20120916_234012.jpg
 

cbetts

NERD!!!
Messages
3,188
Location
Rancho Palos Verdes, CA
I just did a bodylift as well. :link:

I need to go back and look at the brake lines. As far as the shroud, Mudbug showed me the trick (at least on the I-5) of rotating the inner piece to the top. I had to put a screw through the top of the shroud to keep the inner piece from rotating back in place. I will take video showing how to do that if you need it.
 

Reloader

Well-Known Member
Messages
413
Location
Montana a free state
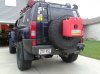
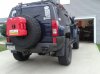
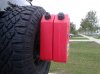
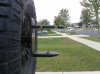
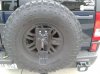
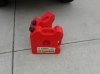
Here are some more pics of my new fuel cans and mount. Those are 3 gallon Rotopacs that I ordered from Timgco. The mount is custom built and the shovel got moved to the Gobi rack along with an axe. They are mounted with Quik Fist tool mounts.20120917_172020.jpg20120917_172117.jpg20120917_172129.jpg20120917_172139-1.jpg

These allow me to carry more fuel and weigh less than the old set up with the shovel mount and steel jerry can.
 

Reloader

Well-Known Member
Messages
413
Location
Montana a free state
Slightly off topic, looks great btw, but how did you mount the rotopax to the spare tire?

Sent from my DROID BIONIC using Tapatalk 2

I made a plate that slides over the spare mounting bolts. Then the spare goes on and clamps it in place. A piece of square tubing is welded to the plate and comes through the wheel center . The can bracket slides into that and is retained with a bolt and knob. The cans and can holding pieces are from Rotopax. Have to remember to burp the rotopax on hot days as they swell up a bit.
 

58Bisc

Well-Known Member
Messages
186
Location
Warminster, PA
In an attempt to help anyone in the future that might be thinking about doing this upgrade, I added an install thread with pictures in the how to section. Hope it helps.
 

Reloader

Well-Known Member
Messages
413
Location
Montana a free state
I just did a bodylift as well. :link:

I need to go back and look at the brake lines. As far as the shroud, Mudbug showed me the trick (at least on the I-5) of rotating the inner piece to the top. I had to put a screw through the top of the shroud to keep the inner piece from rotating back in place. I will take video showing how to do that if you need it.

The Alpha has a different shroud. Its a 2 piece unit that snaps together. Looks exactly like the pics in the body lift instructions.After trimming, the lower rad hose is closer to the fan than before. I think I'll pick up a spare hose from the dealer just in case. Better to have it and not need it.

The brake lines are another issue. With the stock length shocks, the hoses appear to be proper length. But with the longer Bilstiens , the axle drops lower and stretches the pair of hoses fairly tight. For now I just unbolted the top bracket and put in a longer bolt and a tube spacer. Also had to reposition the ABS lines as they were stretched tight too. easy fix there , just drilled lower holes in frame and remounted wires.

The bodylift didnt cause these problems. These are due to the longer Bilstiens and 2'' longer shackles.
 
Top