• Welcome to H4O! For a reduced ad experience, please login or register with the forum.

Rancho Redux Part 3! Steering rack bolt issue

06 H3

a.k.a. "The Jackal"
Messages
9,506
Location
Meridian, ID
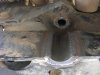
Wow, I cant believe I installed my rancho lift one year ago. So here is the "redux" or improvement #3. The first one was the custom rancho UCP, which is holding up great and #2 was solving the leaf spring issues and #3 is fixing this...

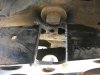
2012-02-11_18-32-16_681.jpg


I think it is worse then what the picture shows but the bolt is being blocked a good amount by the rancho crossmember making steering rack replacement a total PITA. You have to remove the torsion bars, disconnect the a arms and drop the rancho crossmember. I told myself I will do that once and one time only and that is to take it out and notch the crossmember so I have easier access to the steering rack in the future. I am still a few weeks out on doing this but I cant wait too long. The rack is the original one that came on the truck back in 05 along with the PS line. The rack and line are leaking and the bushings are completely shot. The reason I am waiting a bit longer is due to weather, I know, I know I am in so cal....but the im closer to the desert and we have been having nights in the high 20s and low 30s and seeing most of my projects are done later in the day I will be freezing, the nights should be back up into the 40s soon but I need to get this done before school starts so either way this is my next project. It initially scared me in moab when tbone had to change a rack on the trail and then when I took a look at my replacement it would be a nightmare. I actually think once I do this mod changing a rack will be easier compared to a non rancho rig because there is a ton more room to work with then stock.

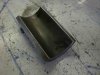
I have two plans and I will decide what plan to use when I am actually doing the work. If I only need to chop a tiny piece out then I will grind it out paint it and leave it. If there is a bigger chunk that needs to be cut out then I will take a pipe cut in half like this

TroughHalves_zps65e041e8.jpg


and then weld that in so the bolt has a slot, obviously plan 2 will look cleaner and better but I am not sure on how necessary this is.

kaleb or reaper, a shout out to you guys because you have done this a lot! How tough is it to do the actual rack swap?
 

MTUH3

Well-Known Member
Messages
315
Location
Plymouth, MI
Shoot if need be just build a fire in the drive way. Heat and light. Oh wait, you might burn the state down...
 

Kyle

Well-Known Member
Messages
1,707
Location
Santa Clarita, CA
Shoot if need be just build a fire in the drive way. Heat and light. Oh wait, you might burn the state down...

hahah burn the state down, no, in SCV some neighbor would see it in a matter of minutes and would have the good ol SCV police there in a heartbeat and a minimum of at least a 20 cops would show up! including sirens and lights! SWAT might even come if there bored enough. :giggle:
 

am4x4

Active Member
Messages
40
Location
simi valley, ca
Mr. 06 H3 dropped his rig off this morning to get this issue taken care of so I thought I would add some tech to this thread

First off, it turns out that there is no top on the crossmember in this area which means the mod can be done with the Rancho crossmember on the vehicle. This saves a TON of work and helps prevent warping of the crossmember.


After some measuring and marking I took the plasma cutter to it and removed the problem area.
CIMG2991 small.jpg


Next I took a piece of 2"x.250" wall tube and cut a slice to fill the hole.


CIMG2993 small.jpg


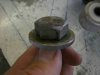
The washer on the rack bolt is about 1 7/8" diam but I needed it to fit through the slice of tube which has a 1.5" id so I ground the washer down to 1.5"


CIMG2992 small.jpg


Tacked the slice of tube in place


CIMG2996 small.jpg

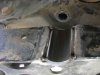
And burned it In

CIMG3004 small.jpg
 

06 H3

a.k.a. "The Jackal"
Messages
9,506
Location
Meridian, ID
Looks awesome! IMO this should be done to all rancho lifted 3s. If you break one you literally have to dissemble the front end just to get the bolt out. This eliminates that.

I am jealous of those welds too...lol
 

4speedfunk

Well-Known Member
Messages
4,250
Location
Tardville
Been there...done that. I completely agree on all points. The Rancho kit is an awesome upgrade over stock, and being able to swap-out the rack while keeping things assembled makes it even better. Using the truck as a jig to keep everything in alignment is a great idea. Nice job (pretty welds too).
 

Hunner

Well-Known Member
Messages
2,334
Location
Arkansas
Your wisdom abounds having someone with the proper skills do a proper fix. That is very well done. Makes you wonder why it did not come that way?
The rack will not be a problem for you at this point. Just make sure to tie off the steering wheel.
I have not done one with the tie rods in place but hear that can be done, if your brother will help.
When messing with the tiny bolt that joins the shaft to the rack remember it is threaded on both sides of the clevis it goes thru. So don't unscrew one side and get torqued because it won't come out yet. I used thread locker when re-assembling that little life threatening device. It was something like 8 mm??
Broke one on a Corvair (Nader special) one time in a high speed turn. Rear engine cars are fun with no steering deep in a curve!
 

am4x4

Active Member
Messages
40
Location
simi valley, ca
Your wisdom abounds having someone with the proper skills do a proper fix. That is very well done. Makes you wonder why it did not come that way?
The rack will not be a problem for you at this point. Just make sure to tie off the steering wheel.
I have not done one with the tie rods in place but hear that can be done, if your brother will help.
When messing with the tiny bolt that joins the shaft to the rack remember it is threaded on both sides of the clevis it goes thru. So don't unscrew one side and get torqued because it won't come out yet. I used thread locker when re-assembling that little life threatening device. It was something like 8 mm??
Broke one on a Corvair (Nader special) one time in a high speed turn. Rear engine cars are fun with no steering deep in a curve!

Thanks for the advice but I also replaced his rack yesterday after I did the crossmember mod. The tie rod ends were off the rack so it was not too bad, I could see it being much more of a PITA with the ends on the rack.

I also wonder why they did not build it with the proper clearance for the rack bolt, it would have been very easy for them to build it that way. Like Chris said, imagine having to remove that crossmember while stuck on the trail with the rig in who knows what position.
 
Last edited:

RamRod

Well-Known Member
Messages
3,914
Location
AB, Canada
If a guy wanted to do this mod, would he be able to do it without removing the cross member if he didn't have access to a plasma cutter?

I will climb under and take a look after work, just trying to plan my attack!
 

06 H3

a.k.a. "The Jackal"
Messages
9,506
Location
Meridian, ID
I'm not sure. Honestly can't you put in the rack bracket without full removal of the rack itself?

It would depend on what kit you use. If your using new bushings then it would have to be removed if not then you wouldn't have to. I'd recommend this mod though. If your on a wheeling trip and need to change a rack it will be a PITA
 

RamRod

Well-Known Member
Messages
3,914
Location
AB, Canada
I'm not sure. Honestly can't you put in the rack bracket without full removal of the rack itself?

It would depend on what kit you use. If your using new bushings then it would have to be removed if not then you wouldn't have to. I'd recommend this mod though. If your on a wheeling trip and need to change a rack it will be a PITA

The kit I picked up has new bushings, which in the long run is good since its getting me to do his mod, which might save my ass in the long run!

Good news is I found a guy willing to lend me a hand with his plasma cutter next week.

My local Toyota Club are a really good group of guys!
 

RamRod

Well-Known Member
Messages
3,914
Location
AB, Canada
I've got a few friends on the lookout for a scrap piece of tubing to weld in there, someone's gotta be able to find be a piece I can use in a week :D
 

rascole

Well-Known Member
Messages
2,852
Location
Bellflower, CA
You can also find some 2" schedule 80 pipe. I believe it is .250" wall and almost 2" ID so no trimming of the washer. Pipe and tube use different dimension for measurement so 2" pipe is closer to 2-3/8" OD.
 
Top