i'll take a picture of the foam block i cut out, it will show you about how much room you got. as for the roof, its not smooth up there, there was some areas that had more room than others, guess its the way they made the cross members or something, couldnt see the greatest, just be sure to take enough pieces off holding the headliner up so you can have some slack and not cause a crease in the liner.

-
Welcome to H4O! For a reduced ad experience, please login or register with the forum.
You are using an out of date browser. It may not display this or other websites correctly.
You should upgrade or use an alternative browser.
You should upgrade or use an alternative browser.
chad's h3 build
- Thread starter chad
- Start date
digglesworth
Well-Known Member
- Messages
- 1,789
- Location
- illinois
Awesome. Thanks. I planned on taking the visors and the pillar trim off. Hopefully that'll give me a little room to investigate...


digglesworth
Well-Known Member
- Messages
- 1,789
- Location
- illinois
Hmmmm. Might be close.
to get up in there you will need to take at least visors, rear view mirror, a pillars, passenger overhead handle, and some trim by the door off, all that takes maybe 10 minutes by yourself, once thats off you should have enough room to peak up in there.Hmmmm. Might be close.
digglesworth
Well-Known Member
- Messages
- 1,789
- Location
- illinois


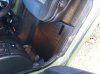
I'm also concerned with how the mount would "snap" into the headliner. It's not really rigid. the mount slips in but theres nowhere to screw it in. Maybe a little silicone around the lip will glue it into the hole I cut in the headliner.
digglesworth
Well-Known Member
- Messages
- 1,789
- Location
- illinois
Check out my "switch location" thread. I made a trim piece to put the switch plate in and have something to screw through into some metal strips. I think it will work.
What size is the MOLLE panel?
The one for the back of the seat?
RamRod
Well-Known Member
- Messages
- 3,914
- Location
- AB, Canada
When mounting my set of gauges in the same location I cut out an aluminum plate to bolt to, you could do the same so the clips have soling solid to grab...
Sent from my iPad using Tapatalk HD
Sent from my iPad using Tapatalk HD
Attachments


SolidusJ
Well-Known Member
- Messages
- 2,028
- Location
- FT. Carson, CO
View attachment 13795View attachment 13796 added a dual usb plug in in the blank switch area.
OHHH very sexy, do tell more!!! I hate having my car charger half way plugged in when not in use plus the cord wrapped around the shiftier. So with this set up if I have a USB plug in the jack it wouldn't use power until my phone is hooked up?
spillKill
Well-Known Member
- Messages
- 356
- Location
- north carolina
Yes that is very kool! How hard was it?
http://m.ebay.com/itm/121250323967?nav=SEARCH this is the USB I got. It's one I the easiest mods I did. Just drimmel out the hole bigger for the USB and it uses to wires, positive and negative. Just ran the ground to the same place my other grounds where and the hot wire to the fuse panel I have under the dash. The way mine is wired it's always hot just like the factory 12v sockets. There is no light or anything so there is no drain when nothing is being charged.
spillKill
Well-Known Member
- Messages
- 356
- Location
- north carolina
thanks! I instantly thought about putting this on the back side of the console as I always have people in the back want to charge their phones
I was thinking about the same thing with a 110v plugin too. Just wanted to order that one and see how it was. The quality seems good since it's a marine grade product.thanks! I instantly thought about putting this on the back side of the console as I always have people in the back want to charge their phones


mantracker
Well-Known Member
- Messages
- 159
- Location
- Tennessee
Chad, you've done a great job on your ride. Keep up the good work. I sometimes go to Fayetteville. If I see it, I'll stop and check it out.
not big mods but could come in handy, i welded the brush guard, d-ring mounts, and the winch mount as one so its easier to take off and put back on by myself, and i added a front receiver hitch setup, i've always heard its easier to maneuver trailers in tight spots from the front, i dunno but only cost $10 and some time.


Attachments


looks good! The D ring mounts welded to the brush guard would help me out a lot, I know that. I like your rope pulley setup for holding the brushguard up in your garage. Lifting my predator brushguard into place by myself, balancing D ring mounts,and bolts so I can get it back together is a huge pain.
Happy Hummer
Well-Known Member
- Messages
- 1,455
- Location
- Wisconsin
At 1st wasn't sure about this build but nice...
Chris
Chris