• Welcome to H4O! For a reduced ad experience, please login or register with the forum.

H3 Carbon Fiber Parts

GreatDaneHummer

Well-Known Member
Messages
994
Location
Chicago
With the front of my H3 needing to get rebuilt after the car accident I am going to take this opportunity to make some of the parts out of Carbon Fiber and Spectra Carbon Kevlar. I wanted to see if there is any interest from others on here that would want a limited run of front end parts for their H3's as well? I agree 100% with CJ that every pound removed from the H3 is a victory. Please let me know if interested?

I don't know pricing yet but they wont be that cheap as I only use the best materials available.

Parts I know for sure I will be making:

1.) Front lower plastic bumper cover

2.) Front upper plastic bumper cover

3.) The metal bumper itself

4.) The fender flares (in the front)

5.) The hood
 

GreatDaneHummer

Well-Known Member
Messages
994
Location
Chicago
The only real change I want to do is have some holes for air to vent out in the front section and maybe make the fender flares an inch wider or so. When I make these parts the mold will only really handle 5 copies and I will not be making another mold so basically 5 of each part can be made.
 

amrg

Well-Known Member
Messages
2,317
Location
Qatar
How much would this cost?

But the hood with openings would be a nice idea
 

4speedfunk

Well-Known Member
Messages
4,250
Location
Tardville
I am very interested in a hood. But I want a FLAT hood. Get 20 lbs of modeling clay and fill in the rain funnel...then make a mold. No goofy fake louvre or holes...no recess...just a nice, flat, hood like it should have come with, in the first place. Hinged preferred but lift-off (dzus fasteners) my be acceptable.

Bonus if you can get rid of the equally goofy hinge covers, and make the flat hood extend over them as well.
 

atvspeed4

Well-Known Member
Messages
1,216
Location
massachusetts
The silly A-pillar covers on the exterior sides of windshield that are really hard to find and break easy after a few windshield replacements. Also a replacement for the factory offroad light piece on the roof that bolts into the same holes but has a recessed curved lightbar
 

GreatDaneHummer

Well-Known Member
Messages
994
Location
Chicago
I do not have numbers yet. I know I am going to do this for my truck because I need the parts and want to use material that I already purchased here for the H1 project. Good all carbon fiber or carbon Kevlar parts are not cheap; to get an idea look at what they charge for the H2 Carbon Fiber OEM style hood:

http://www.visracing.com/newcatalog...ummer-H2-4Dr-Oem-Style-Carbon-Fiber-Hood.html

A few things about buying carbon fiber hoods etc. most are between 2-3 layers of carbon fiber if they are called (pure). About 50% of the companies out there that advertise a carbon fiber hood do three layers but the center layer is fiberglass to cut costs. Many of them including the one in the link is an OEM style hood but the under body of it is not the same reinforcement to keep from bending / warping etc.. You can see in the text it shows you should use pins and for off road use only. That is because it is thin with few layers.

Full disclosure I have made only 7 different style parts now for the H1 project and I use a 15 layer process using all carbon fiber and carbon kevlar sheets rated the same for MIL spec and Aerospace. For a hood I would use 2 layers on the top and 3-4 on the bottom side mating them together with epoxy. Sorry for the ramble but I wanted to give a little back ground to how I approach composite materials vs. the mainstream.
 

GreatDaneHummer

Well-Known Member
Messages
994
Location
Chicago
I am very interested in a hood. But I want a FLAT hood. Get 20 lbs of modeling clay and fill in the rain funnel...then make a mold. No goofy fake louvre or holes...no recess...just a nice, flat, hood like it should have come with, in the first place. Hinged preferred but lift-off (dzus fasteners) my be acceptable.

Bonus if you can get rid of the equally goofy hinge covers, and make the flat hood extend over them as well.

It will be hinged just like OEM. When I am done with this OEM mold I should be able to fill in the center and get 1 more good clean flat hood for ya. 1 of 1 though as long as the mold doesn't warp too much between each bake.
 

GreatDaneHummer

Well-Known Member
Messages
994
Location
Chicago
I can't even make a 3 layer carbon fiber hood for $650 in material. Generally for a layer this size its at least $218 each layer then you have to add in the cost of epoxy etc. I will eat the mold cost because I am doing it for myself no matter what but in the end doing things right and making good parts out of carbon fiber / carbon kevlar is not cheap.
 

GreatDaneHummer

Well-Known Member
Messages
994
Location
Chicago
I will have pictures up soon of the second one I have done. You might be surprised with how well the clean OEM hood looks without any plastic fake hood louvers. The first one was not except able due to micro fractures in the epoxy from how cold it has been in Chicago lately. I have a new space I am working in now so it is more temperature controlled etc..
 

rascole

Well-Known Member
Messages
2,852
Location
Bellflower, CA
I have a hood with no louvers and it looks great. The only problem is the indent in the front collects water, it would be nice if the hood was raised slightly instead of recessed, like a 1" cowl induction hood.
 

GreatDaneHummer

Well-Known Member
Messages
994
Location
Chicago
Any modifications over OEM design would force me to create a custom designed mold increasing cost and time. Honestly I would not even go down this road if it wasn't for my front end getting messed up in an accident. The hood will be exactly OEM without the fake air vents. The side fenders will be 1" larger opening and 2" wider. The biggest challenge to the side fender are how to cover the inside wheel well completely and still look OEM.
 

rascole

Well-Known Member
Messages
2,852
Location
Bellflower, CA
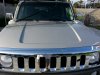
Here is a picture of mine after I repaired it after an accident. Love the looks and fortunately here is SoCal we get little rain so puddling up on the hood is minimal. Either way I am interested when you are done.

20140322_172745 (1280x960).jpg
 

Bruces

Well-Known Member
Messages
215
Location
Portland, TN
If you had a donor hood you could cut the indented part along the upper rim of the outer skin only, flip it over, tack in place and viola, a mold with raised center.
 
Top