• Welcome to H4O! For a reduced ad experience, please login or register with the forum.

H3slate's 06 Manual Adventure

H3slate

Brush raked
Messages
983
Location
Tualatin, Oregon
Just got back from my trip to Mt. Rainier and the Naches Pass trail. Due to our camping circumstances (not sure where we were staying each night) I ran all weekend with my rack loaded with gear. It definitely made my trip possible. With two kids in the back and more gear inside, I needed all the space I could get.

I would also recommend the Plano 1819 XXL Storage box. You can get it on Amazon for $47, but I got mine from Home Depot for $25. They hold a lot of stuff, have wheels, and keep the dust and dirt out.

mini-P1020389.jpg


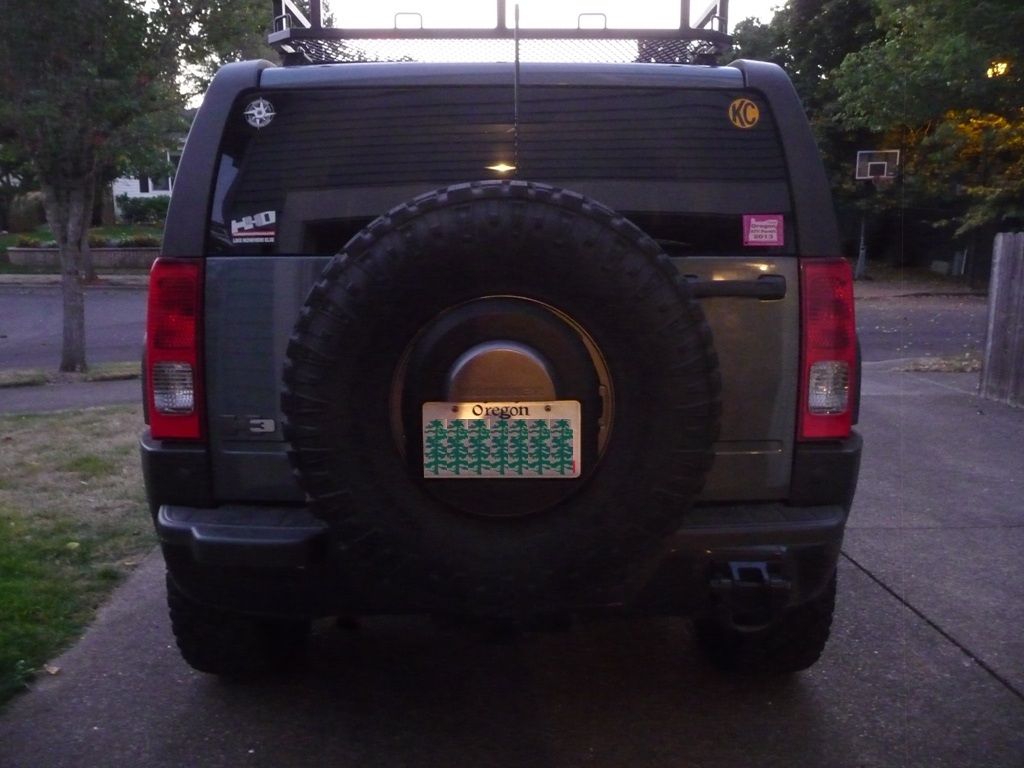
What's next? I just got an H2 spare tire license plate holder to dechrome and put on my spare. I am tired of bending my plate on obstacles and I have another tow hook to take up that space on the bumper.

I will probably plan a trip this fall to the Knight Metal Works R&D facility to design and make: a rear cargo storage shelf w/ tie downs, an under dash cb radio mount, a secure mount for my locking fuel door, hood handles (they look cool and will secure my hood louver), and a roof rack mount for an axe or shovel.
 

H3slate

Brush raked
Messages
983
Location
Tualatin, Oregon
Finally got my spare tire license plate holder painted and mounted.

P1020531small.jpg


I reused the original license plate light and made a bracket to attach it to the new holder.

Next up is replacing the bushings and ball joints on my front end and finding a fix for my steering rack.
 

bebe

Moderator
Messages
1,375
Location
Dayton, NV
After a year of "mall crawler" status I got invited to a Hummer Happening in Reno with Rod Hall.

I had a blast. It really opened my eyes to what my vehicle was capable of and what I had been missing. I met bebe there and she told me about this magical place called the interwebs where other Hummer owners got together and shared information. :emb:

LOL I had so much fun on that trip! Learned a lot :)
 

H3slate

Brush raked
Messages
983
Location
Tualatin, Oregon
LOL I had so much fun on that trip! Learned a lot :)

It was a lot of fun! Reno has some fun wheeling spots close to town. My brother in law came with me on the trip, so we ran Peavine twice and went back to the gravel pit so he could get some time in behind the wheel.

Rod Hall and his family/crew were great! Good directions and feedback. I liked that the very first obstacle they sent us through was a ditch to bend up our license plates.
 

H3slate

Brush raked
Messages
983
Location
Tualatin, Oregon
Some updates for my truck. Just got a new windshield today, :horns: I had put it off for a couple of years. I think it is my fourth windshield so far.

Knight Metal Works had made a custom cb radio mount for me awhile ago, and I finally got it installed. The mount was made to attach to the metal under the bottom of the dash, and the radio fits snugly to the right of the steering wheel on the lower part of the dash. I had previously mounted it here with velcro.

pic of the mount after some paint
mini-P1020625.jpg


pic of my uniden cb radio in the mount
mini-P1020626.jpg


Install location
mini-P1020627.jpg


leg clearance
mini-P1020630.jpg


My mic attaches to the upper dash tray to keep it out of the way but close at hand
mini-P1020629.jpg


On last summer's trips Scarsman had to help manually make my hi-lift jack operate properly. :emb: So in preparation of this summer's trips, I used the hi-lift rebuild kit and lubricated the moving parts. I also got a nice little booty to help keep the jack fully functional.

mini-P1020631.jpg
 

H3slate

Brush raked
Messages
983
Location
Tualatin, Oregon
Is that cb mount bolt on or drilling required?

Looks awesome

I didn't want to drill through the plastic dash, hence the velcro solution. I drilled two holes in the sheet metal under the dash to bolt the mount in place. I had to move the lower dash panel a little to drill the holes, then snapped it back in place when I was done. The hardest part was getting the bolts started in the holes from the bottom.
 

H3slate

Brush raked
Messages
983
Location
Tualatin, Oregon
My steering is better thanks to the franken steering bracket I got from Hunner Xtreme. I still want to replace the bushings and ball joints in the front suspension.

I still plan to make a rear cargo shelf this spring at Knight Metal Works. Next up is finding a permanent solution to my sunroof drain leak and slow leaks from the rear fender flare attachment points. I also want to repaint my line-x fender flares, they are showing a lot of sun damage.
 

Scarsman

Sponsor
Messages
1,561
Location
Monroe, WA
That looks great! I'm not going to comment on the "I got a nice little booty" thing. I'll just leave that one alone! :mock:


Is that cb mount bolt on or drilling required?

Looks awesome

That was done "mail order." If I had an H3 to look at I could probably make it it no-drill. I just didn't have anything to work with at the time.
 

H3slate

Brush raked
Messages
983
Location
Tualatin, Oregon
What happened to the carpet? Looks a little barren in there.

I took the carpet out because of a sunroof drain leak. Water is also getting in the back where the fender flares attach to the body. The drain has been cleaned out and is functional again, still trying to come up with a solution for the flares before I put the carpet back in.
 

3Hummers

Super Moderator
Staff member
Messages
10,529
Location
Central Texas
I will have to look at the H3 when I am in Texas next week but I have had good luck sealing penetrations with rubber washers and sealant. Don't remember exactly how the H3 flares attach so just through that out. I will look at it next week and see what I can come up with.
 

H3slate

Brush raked
Messages
983
Location
Tualatin, Oregon
I will have to look at the H3 when I am in Texas next week but I have had good luck sealing penetrations with rubber washers and sealant. Don't remember exactly how the H3 flares attach so just through that out. I will look at it next week and see what I can come up with.

The flares attach with push in grommets that have a rubber washer. Since I line-x mine, they don't fit as well. I put the rubber trim back on hoping that would help but it hasn't. My idea to fix it is to replace the grommets with bolts so I can get a tight fit against the body.
 

JDstagg

Well-Known Member
Messages
45
Location
Phenix City, Alabama
H3Slate and Scarsman you guys have some impressive designs and builds!!! Any chance some of you guys wanna make a trip south to say Florida this summer and help work on mine?? LOL Scarsman, any plans in the making for a rack thats half that size? I am needing something to just put a little bit of gear up there for trips with the kids and dogs. H3Slate, how difficult was the line-x work on the fenders? I am wanting to do some DIY mods on the weekend, but I want to avoid dstroying the H3 like I did my Jeep so help and guidance would be great.

JD
 

Scarsman

Sponsor
Messages
1,561
Location
Monroe, WA
Thanks! Yes, I could definitely make a shorter rack. I would just need to know how long you wanted it.

Sent from my C771 using Tapatalk
 

H3slate

Brush raked
Messages
983
Location
Tualatin, Oregon
The work wasn't difficult to line-x the fenders, a shop did it for me. :wink: I had it color matched, but it is showing a lot of wear for three years. Some bad sun damage on the top part of the front fenders.

Other than the color fading, I love having line-x fender flares. They don't get scratched on the trail, and the rear door flares don't show the abuse of rocks that gets thrown at them. My black line-x grill has held up really well, if I did it again I would just do my fenders black. The black includes a UV protection.

On the roof rack, do you mean shorter as in not as tall? Cause Scarsman has built a similar rack with shorter rails.
 

H3slate

Brush raked
Messages
983
Location
Tualatin, Oregon
I have added a set of H2 hood handles to add to the look and to prevent my hood louver from coming off.

mini-P1020637.jpg


They were a challenge to get installed, I was pretty paranoid about the alignment between the two. Also had to do some cutting under the hood to get to the bolts to secure them. The handles are a dark black and my hood louver is a faded black, not sure if I will paint both of them or try to restore the louver. I might just Line-x them to match the grill. :huh:


I also finally got around to reinstalling my fuel door. It had gotten torn off at Evans Creek a couple of years ago. It was only held on by two small screws that attached it to the plastic fuel bucket. I wanted to somehow attach it to the fender flare. I was able to utilize four bolt holes that originally were just decorative as attachment points. I spent about 30 min. creating a mounting template to take to Robert's when I realized I could just use some fender washers to secure the door. :emb:

I had to do some minor cutting to the fuel bucket to make room for the washers. I was also able to get rid of the chrome bolts on the fuel door. I will probably repaint the door to match the roof rack.

mini-P1020640.jpg
 
Top