
-
Welcome to H4O! For a reduced ad experience, please login or register with the forum.
You are using an out of date browser. It may not display this or other websites correctly.
You should upgrade or use an alternative browser.
You should upgrade or use an alternative browser.
JPaul's H3 Base build
- Thread starter JPaul
- Start date
JPaul
Well-Known Member
- Messages
- 2,436
- Location
- Way up north, UT
Not yet, they are still on my todo list. Part of the holdup on that was wiring, but that is addressed now that I have that harness in place in the fuse box. The other part was figuring out where to put my antennas. I have plans I drew up for foldover mounts that are sturdy enough for offroading, and have the materials, just haven't done anything with them yet. I considered just putting them on the nose of the truck like I'm seeing a lot of the Aussie's doing, but now that I have the roof basket I'm trying to decide again, though I may still just put them on the nose, I can always change it later. Another holdup for a while was where to even put the radios in the H3, but I've settled on just mounting them to the dash in front of my steering wheel, at least for now. I now have an idea to make a custom overhead console that I may put at least one of the radios in, or both.
So now it's just a matter of finalizing the antenna mounts and then taking the time to get them all installed and tuned. Tomorrow I am planning on finishing up my heated mirrors and front speakers, and probably the in-cab winch controls. We'll see what else I can get to, it will partly depend on the weather tomorrow. I'm trying to not end up with too many half finished projects on the H3, I need to finish up some of them before I can start on others.
So now it's just a matter of finalizing the antenna mounts and then taking the time to get them all installed and tuned. Tomorrow I am planning on finishing up my heated mirrors and front speakers, and probably the in-cab winch controls. We'll see what else I can get to, it will partly depend on the weather tomorrow. I'm trying to not end up with too many half finished projects on the H3, I need to finish up some of them before I can start on others.

JPaul
Well-Known Member
- Messages
- 2,436
- Location
- Way up north, UT
Aye, though I would need to bond the rack to the body if I mount the antennas to it. I'm going to bond the whole truck later on, found a source for some 1/2" tinned copper braid strapping on ebay to use for that, $26 for 25 feet I think.
Sent from my SM-N910T using Tapatalk
Sent from my SM-N910T using Tapatalk
Wel, that's the thing.... You might just find that you don't necessarily HAVE to bond the rack to the truck. It *might* just be sufficient by itself. But then again, it might also not. LOL
Either way, best of luck to you as you finish this really nicely thought out build.
Either way, best of luck to you as you finish this really nicely thought out build.
JPaul
Well-Known Member
- Messages
- 2,436
- Location
- Way up north, UT
After a great deal more work than I anticipated I succeeded in converting my mirrors to have heat!
http://www.hummer4x4offroad.com/forum/showthread.php?10954-H3-Heated-mirrors-conversion
[video=youtube_share;s7tkHjhsKwg]https://youtu.be/s7tkHjhsKwg[/video]
They work great and I have them wired in to the rear defroster so that when I turn on the rear defroster the mirrors heat up as well, just like my Jeep Liberty did. This means they also shut off automatically as well so I don't have to worry about draining my battery or burning something up. Yay for heated mirrors!!
http://www.hummer4x4offroad.com/forum/showthread.php?10954-H3-Heated-mirrors-conversion
[video=youtube_share;s7tkHjhsKwg]https://youtu.be/s7tkHjhsKwg[/video]
They work great and I have them wired in to the rear defroster so that when I turn on the rear defroster the mirrors heat up as well, just like my Jeep Liberty did. This means they also shut off automatically as well so I don't have to worry about draining my battery or burning something up. Yay for heated mirrors!!
JPaul
Well-Known Member
- Messages
- 2,436
- Location
- Way up north, UT
Well I was able to sell the trailer tonight for as much as I paid for it thankfully. I did chop off those stupid struts the guy had welded on, and after discovering yesterday morning that the bearings were loose on both sides, got them tightened up properly last night. The guy that bought it is in the National Guard, and is going to use it to haul a motorcycle up to his parents place.
The lesson from all this is never buy a home made trailer unless you are either getting it from someone that is an excellent welder with lots of experience building trailers, or you just want to use it to beat the crap out of it. Never again am I doing this.
I have the roof basket now so I can hold off on working on a trailer for a while. So there's that.
The lesson from all this is never buy a home made trailer unless you are either getting it from someone that is an excellent welder with lots of experience building trailers, or you just want to use it to beat the crap out of it. Never again am I doing this.
I have the roof basket now so I can hold off on working on a trailer for a while. So there's that.
JPaul
Well-Known Member
- Messages
- 2,436
- Location
- Way up north, UT
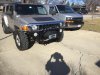
I was able to take advantage of the warmth yesterday and got a bunch done on the Hummer. First thing I did was level the front since I will be getting an alignment done when the dealer fixes my tie rods this week. I thought it was an axle making the popping noises, but when they got it up into the air they determined the inner and outer tie rods on both sides are worn out and need to be replaced. I'm glad I bought the extended warranty as it means I won't have to fix it myself, even though the deductible is the same amount as the parts are.
I also get the recall work done on Friday, so now my H3 shouldn't burn to the ground randomly, not for that reason at least.
Here it is after leveling it:

I also get the recall work done on Friday, so now my H3 shouldn't burn to the ground randomly, not for that reason at least.
Here it is after leveling it:
JPaul
Well-Known Member
- Messages
- 2,436
- Location
- Way up north, UT
I also was able to finally get the spot lights for the winch installed, as well as the in-cab winch controls, and the set of Cadillac horns I picked up last month.
I wasn't quite as thorough documenting everything with these mods, but mostly it was leaving out the wiring tutorials and wiring routing.
Here is where I got to before finally stopping to take a picture:

I had the horns mounted (there are four of them!), the winch control box brackets reworked so that I could unscrew the cover without having to unbolt the brackets from the box itself (I wasn't very thorough when I first made the brackets to mount the box), and that is pretty much it. It took me a little bit to figure out where to mount the horns, partly due to space constraints, and partly because I wanted to make sure they weren't positioned so that water would collect in them and wreck them. You can't adjust the orientation of the brackets and I did not want to fabricate new ones, so I got creative. I think it worked out really well in the end, though I wish the one on the passenger side faced down more.
Some pics of the two horns on the driver side:


I actually used the bolts that mount the fog light pods to the grille on the Thor bumper to mount the horns (I did the same on the passenger side, but was only able to mount one there because of the AC line being in the way at the bottom). It was quite convenient the way that worked out.
I wasn't quite as thorough documenting everything with these mods, but mostly it was leaving out the wiring tutorials and wiring routing.
Here is where I got to before finally stopping to take a picture:
I had the horns mounted (there are four of them!), the winch control box brackets reworked so that I could unscrew the cover without having to unbolt the brackets from the box itself (I wasn't very thorough when I first made the brackets to mount the box), and that is pretty much it. It took me a little bit to figure out where to mount the horns, partly due to space constraints, and partly because I wanted to make sure they weren't positioned so that water would collect in them and wreck them. You can't adjust the orientation of the brackets and I did not want to fabricate new ones, so I got creative. I think it worked out really well in the end, though I wish the one on the passenger side faced down more.
Some pics of the two horns on the driver side:
I actually used the bolts that mount the fog light pods to the grille on the Thor bumper to mount the horns (I did the same on the passenger side, but was only able to mount one there because of the AC line being in the way at the bottom). It was quite convenient the way that worked out.
JPaul
Well-Known Member
- Messages
- 2,436
- Location
- Way up north, UT
So with the horns mounted I started on the wiring for the lights and winch controls. When I popped off the trim panel under the steering wheel I realized that where I was going to mount them wasn't going to work ( I was going to put them over by the center console) because of the crash plate that is behind the trim panel. Fortunately I stared at everything long enough to realize I could put them on the other side and they'd all barely fit. Really, there is room by the ignition side of the steering column for some toggle switches, but only enough for one or two.
In order to make sure the switches would fit, I had to bend the crash plate a little to provide some more clearance:

This is what I was met with on the ignition side, If you bend the plate the same as I did on the other side, you can fit one or two 1-1/8" body switches without cutting the plate (which is what others that have put the ARB style toggles anywhere on this trim panel have done I am assuming).:

In order to make sure the switches would fit, I had to bend the crash plate a little to provide some more clearance:
This is what I was met with on the ignition side, If you bend the plate the same as I did on the other side, you can fit one or two 1-1/8" body switches without cutting the plate (which is what others that have put the ARB style toggles anywhere on this trim panel have done I am assuming).:
JPaul
Well-Known Member
- Messages
- 2,436
- Location
- Way up north, UT
I then measured and drilled the panel for the switches:

Then mounted the switches. The green safety switch is the power kill for the in/out momentary toggle switch that is next to it, it prevents the in/out toggle from turning on the winch accidentally, since my knee can get pretty close to that sometimes when getting in, plus it's just a good idea since the in-cab controls are always hooked up to the winch, unlike the tethered remote that you have to plug in first. The switch all the way to the right is for the spot lamps that I mounted to the fairlead. I have another rubber boot for the light switch that I might put on it, but for now I figure I'd just have it on the winch in/out control. My thinking is that I'll possibly be muddy while running the winch, and don't want to muck up the switch. I went with regular toggle switches because I didn't dfind any of the ARB style that I really liked, plus they take up a fair bit more room.

Unwired:

Wired:

I tapped into the switched supply wire I have already coming in (it was originally just for powering the monitor on my dashboard) since I figure I'm never going to really need to run the winch without at least having my keys with me, plus it prevents anyone from mucking with it. It also keeps the spotlamps from being on without the key on, so they don't get bumped on or left on and run down the battery. The lights are powered through a waterproof relay, so the switch just turns on the relay.
Then mounted the switches. The green safety switch is the power kill for the in/out momentary toggle switch that is next to it, it prevents the in/out toggle from turning on the winch accidentally, since my knee can get pretty close to that sometimes when getting in, plus it's just a good idea since the in-cab controls are always hooked up to the winch, unlike the tethered remote that you have to plug in first. The switch all the way to the right is for the spot lamps that I mounted to the fairlead. I have another rubber boot for the light switch that I might put on it, but for now I figure I'd just have it on the winch in/out control. My thinking is that I'll possibly be muddy while running the winch, and don't want to muck up the switch. I went with regular toggle switches because I didn't dfind any of the ARB style that I really liked, plus they take up a fair bit more room.
Unwired:
Wired:
I tapped into the switched supply wire I have already coming in (it was originally just for powering the monitor on my dashboard) since I figure I'm never going to really need to run the winch without at least having my keys with me, plus it prevents anyone from mucking with it. It also keeps the spotlamps from being on without the key on, so they don't get bumped on or left on and run down the battery. The lights are powered through a waterproof relay, so the switch just turns on the relay.
JPaul
Well-Known Member
- Messages
- 2,436
- Location
- Way up north, UT
Here's some shots of everything all buttoned up inside:


The green safety cover isn't quite as bright as these photos are making it look.
The green safety cover isn't quite as bright as these photos are making it look.
JPaul
Well-Known Member
- Messages
- 2,436
- Location
- Way up north, UT
Here's a pic from after the wiring was all done. I didn't think to take a pic of the relays, but the are mounted to the winch controller box mounting bracket, they are hidden right behind the box. The wiring isn't as neat as I would have liked it, but it was taking me forever to get it all done, and I was exhausted towards the end. Maybe someday I'll rewire. HA!, yeah, that will totally happen! :no:
Anyway, for now I have the wires for the winch controls running directly into the box without a plug or even a grommet. I just wanted them done. Eventually I am going to splice in a Deutsch 2 pin connector so that I can pull the box off if needs be, and add a grommet for the wires at the same time. Maybe next weekend.

The horns draw a lot more power than the single stock one did, so I have them running through a relay which is feeding from the same power circuit as the spot lights are. That power is being supplied by fuse 2 (grill lights, duh) that is tapped into via the 8 pin add on connector I added last year to the fuse box. It's 12 gauge with a 20 amp fuse, as I may add on other lights to the nose of the Hummer later on. Nothing crazy though.
I don't have a sound clip of the horns yet, It's Sunday and I don't want to disturb anyone. I need to go somewhere outside of the neighborhood and do a comparison of the stock horn and the Cadillac horns. Maybe I'll just wait till I'm down at Neo's for Moab or something. They sound great though.
Anyway, for now I have the wires for the winch controls running directly into the box without a plug or even a grommet. I just wanted them done. Eventually I am going to splice in a Deutsch 2 pin connector so that I can pull the box off if needs be, and add a grommet for the wires at the same time. Maybe next weekend.
The horns draw a lot more power than the single stock one did, so I have them running through a relay which is feeding from the same power circuit as the spot lights are. That power is being supplied by fuse 2 (grill lights, duh) that is tapped into via the 8 pin add on connector I added last year to the fuse box. It's 12 gauge with a 20 amp fuse, as I may add on other lights to the nose of the Hummer later on. Nothing crazy though.
I don't have a sound clip of the horns yet, It's Sunday and I don't want to disturb anyone. I need to go somewhere outside of the neighborhood and do a comparison of the stock horn and the Cadillac horns. Maybe I'll just wait till I'm down at Neo's for Moab or something. They sound great though.
JPaul
Well-Known Member
- Messages
- 2,436
- Location
- Way up north, UT
Here is the front all buttoned up.


It came out really nice, and I'm very happy to finally have those lights installed (they've been sitting downstairs for MONTHS), and to have my in-cab winch controls hooked up. I haven't put the new cable on yet because I was hoping to wait until I got the controls wired in, as it was going to be a lot easier (and safer) to test it without having to worry about the cable. The spots are pretty bright, I need to aim them still, you can see one is pointing up more than the other.
I'm also pretty stoked about the Cadillac horns. I was originally planning on some air horns, but was having a hard time finding any that I liked the sound of. They are either too high pitched, or too bloody loud (like, illegally loud), plus having to deal with the air lines and all that, and they are expensive. The Cadillac horns have a really good sound, and with four of them going at once are pretty loud, and they are electric so I think they are a bit easier to install, plus are lower maintenance.
Now I just need to wind on the new winch cable, and I'll be set.
It came out really nice, and I'm very happy to finally have those lights installed (they've been sitting downstairs for MONTHS), and to have my in-cab winch controls hooked up. I haven't put the new cable on yet because I was hoping to wait until I got the controls wired in, as it was going to be a lot easier (and safer) to test it without having to worry about the cable. The spots are pretty bright, I need to aim them still, you can see one is pointing up more than the other.
I'm also pretty stoked about the Cadillac horns. I was originally planning on some air horns, but was having a hard time finding any that I liked the sound of. They are either too high pitched, or too bloody loud (like, illegally loud), plus having to deal with the air lines and all that, and they are expensive. The Cadillac horns have a really good sound, and with four of them going at once are pretty loud, and they are electric so I think they are a bit easier to install, plus are lower maintenance.
Now I just need to wind on the new winch cable, and I'll be set.
JPaul
Well-Known Member
- Messages
- 2,436
- Location
- Way up north, UT
I've had it like that nearly the whole time I've owned the H3 and haven't seen any issues. It's off to the side enough that it's not really restricting airflow that much. The engine fan is offset towards the driver's side, so that is where the bulk of the airflow is going to be.Nice build, but do you think placing the controller box like this covering the radiator is a good idea?
Plus it seems to me that the way the Thor bumper's grill seems far more open than the stock bumper is for airflow that I'm actually getting more airflow than I did stock.
You also have to figure in that I have the I5 which doesn't need as much cooling capacity as the V8 does, which uses the same radiator. So it really isn't affecting it that much. Heck, last October I almost had too much cooling capacity when climbing over Vail pass going to Colorado, the fan was cooling the fluid in the radiator so much that the temp gauge kept crashing down every time the thermostat opened. I had to slow down to try and keep more even of a temperature.
Sent from my SM-N910T using Tapatalk

Cyrus Avey
Well-Known Member
- Messages
- 73
- Location
- San Antonio TX
Awesome job on everything! It's looking great!
[emoji631]It's a Hummer...... That's why we bought them isn't it........???? To drive up sh*t????[emoji848][emoji631]
[emoji631]It's a Hummer...... That's why we bought them isn't it........???? To drive up sh*t????[emoji848][emoji631]
JPaul
Well-Known Member
- Messages
- 2,436
- Location
- Way up north, UT
Took the H3 to the dealer today to have the inner and outer tie rods on both sides replaced, gotta make use of that extended warranty I purchased when I got it! I had them give me the old ones so that I can have them as spares for the trail. They weren't broken yet, just starting to really wear out, so they will make fine spares to get back home on in case I break one on the trail.
Now I just need a spare axle or two.
Now I just need a spare axle or two.
JPaul
Well-Known Member
- Messages
- 2,436
- Location
- Way up north, UT
Got some work done on the roof basket. I welded up brackets for it, and I am really proud of how well they came out, except for one little problem. They are too short. I didn't realize the roof bows up in the middle, and the rack doesn't clear it now. I had spent so much time already on the brackets that I don't want to rebuild them. I figure I'll just go get some aluminum bar stock and make spacers for it. I also have a few gouges in the paint of my roof now. :roll:


Woodtick
Well-Known Member
- Messages
- 801
- Location
- Ilanoid, UP MI
JPaul
Well-Known Member
- Messages
- 2,436
- Location
- Way up north, UT
$30 for a 2' piece of 1.5"x1" aluminum bar. Unfortunately they didn't have anything close to what I needed in their seconds tables. I did see some nice DOM (I think) tube that would work nicely for making some step rails for my OEM sliders. Unfortunately I have to keep my money free right now for anything else I'll need for Moab as well as for getting my CERT gear together. This Thursday is Light Search and Rescue. The next two weeks after that is First Aid and I'll have to get supplies for those classes, not sure how much yet.
JPaul
Well-Known Member
- Messages
- 2,436
- Location
- Way up north, UT
Well I finally was able to get the roof rack finished and mounted.
I went with Woodtick's suggestion and used the unistrut nuts. You have to break the springs off though, there is not enough room for them. But if your bolts are long enough you can get them started pretty easily anyway.


I went with Woodtick's suggestion and used the unistrut nuts. You have to break the springs off though, there is not enough room for them. But if your bolts are long enough you can get them started pretty easily anyway.
JPaul
Well-Known Member
- Messages
- 2,436
- Location
- Way up north, UT
Next up was getting my ham/cb radio install finished up. I started on getting the radios themselves mounted on Friday night, took me about an hour and a half. It's a temporary solution until I can spend the time to make an overhead console, so I just used 3M doublesided foam tape to attach the brackets to the dash. I already had the hole by the dash mounting bolt hogged out thankfully, so I ran my wires down there. I also used doublesided tape to mount the mic holders.


JPaul
Well-Known Member
- Messages
- 2,436
- Location
- Way up north, UT
I actually mounted the rack yesterday (Saturday), but once that was done I started on the antennas. I originally had plans to make fold over mounts for them so that I could just drop them down, but I am short on time with the Moab trip coming up next weekend so I decided to just make fixed mounts. I stood around in my workroom for a while Friday night after getting the radios installed, trying to figure out just how I was going to mount the antennas.
Since I am a bit of a packrat when it comes to potentially useful things (I save every nut, bolt, screw, and washer I have spare, as well as wire, electrical/electronic bits, and any brackets or whatnot, and numerous other things) which was very useful this time as I just so happened to have two bits of aluminum angle that came from a printer type thing my brother in law gave me that I tore down for parts. Not only did these two angles happen to be just the right size, but they also just so happened to each have a hole on one side that was a perfect fit for the CB antenna mount as well as my NMO mount for my 2M radio to give clearance to the center pin. And to top off the fortuitousness they were already anodized black!
All I had to do was drill holes for bolts to use as clamps in each bracket, and for the bracket I was going to use for the NMO, two more holes to bolt the NMO mount on. I also had some aluminum U channel (from that same printer) that was perfect to use for the clamps.
Here is the start of them, this bracket is about 5/16" thick I think, and the other is 1/4" thick. I used the thicker one for the CB antenna since it'd put more strain on the bracket than my much thinner and lighter 2M 5/8's wavelength antenna would. Though it probably still would have been fine.

Here you can see the hole I was talking about, plus each bracket had a tapped hole for a 10-32 bolt that I would use later for bonding.

I used some rubber packing I got from Lowes in their plumbing section to protect the paint and give it good hold.

Since I am a bit of a packrat when it comes to potentially useful things (I save every nut, bolt, screw, and washer I have spare, as well as wire, electrical/electronic bits, and any brackets or whatnot, and numerous other things) which was very useful this time as I just so happened to have two bits of aluminum angle that came from a printer type thing my brother in law gave me that I tore down for parts. Not only did these two angles happen to be just the right size, but they also just so happened to each have a hole on one side that was a perfect fit for the CB antenna mount as well as my NMO mount for my 2M radio to give clearance to the center pin. And to top off the fortuitousness they were already anodized black!
All I had to do was drill holes for bolts to use as clamps in each bracket, and for the bracket I was going to use for the NMO, two more holes to bolt the NMO mount on. I also had some aluminum U channel (from that same printer) that was perfect to use for the clamps.
Here is the start of them, this bracket is about 5/16" thick I think, and the other is 1/4" thick. I used the thicker one for the CB antenna since it'd put more strain on the bracket than my much thinner and lighter 2M 5/8's wavelength antenna would. Though it probably still would have been fine.
Here you can see the hole I was talking about, plus each bracket had a tapped hole for a 10-32 bolt that I would use later for bonding.
I used some rubber packing I got from Lowes in their plumbing section to protect the paint and give it good hold.
