• Welcome to H4O! For a reduced ad experience, please login or register with the forum.

Starting a new rock slider step project DIY build

JPaul

Well-Known Member
Messages
2,436
Location
Way up north, UT
The only criticism I have is the lack of bracing between the brackets and tubes. Those are not going to hold up well at all against hits. Side impact, sure, but hits from the bottom, no. I strongly suggest cutting some triangle braces and welding them in to reinforce the mounting points. There are a couple spots that will need to be gapped to clear the parking brake cables and something else under there I think, but that's easy to do after you weld the angles in. Or you could fabricate braces that bolt in after the main portion has been mounted. That would be even better really, since then you could make the bracing even more effective than the OEM ones. Take a look at how OEM is fabricated and you'll get an idea of how it should be braced.

Even though you're not going to be rock crawling, you'll be a lot more comfortable out on the trails with them reinforced more. You never know what could happen, even when just overlanding on what might be considered basic trails. You probably don't even need to make the braces full size, but at least something a bit more than what you currently have will go a long way to helping them better protect your rig.
 

Happy Hummer

Well-Known Member
Messages
1,465
Location
Wisconsin
Thanks to everyone for the positive feedback. Yes, I do agree about the strengthening of the joint between the tube and the plate. I've really thought about this and I just don't see a safe way to add the gussets without interfering with the cable, lines etc... I've looked at the oem and schwarttzy's for how they achieved this goal as well as rocky road which seemed to for go them in there pics. I've racked my brain on this one and I'm just not feeling it lol!

I am in the process of fabricating some diamond tread plates to act as step plates though. I've just been super busy with life as of late. But maybe today I can break out the plasma and get some work done.
 

JPaul

Well-Known Member
Messages
2,436
Location
Way up north, UT
Well, looking at your pictures, you've got quite a bit of clearance from the tube to the cables since you have it dropping down lower than OEM or other aftermarket sliders. The brackets that don't have any cable next to them at all you can easily gusset. The ones that do I'd just make the gusset as large as you can and you'll be fine since the ones you can fully gusset will help take the impact of the ones you can only partially gusset. Since you're not planning on any extreme rock crawling you'll be fine. They just need a little bit more than the shallow U-channel you fabricated for the mounting plates.

I'd say get some 3/8" bar (or some shallow "U" channel might even be better due to it's ability to resist bending more than simple bar would) to tie the tube to the bracket like this:

wJopy1X.jpg


For spots the cable is in the way just use a shorter length of bar but keep it triangulated as much as possible, particularly get it as high up the bracket as you can, even if you have to pull it in closer to the bracket down at the tube. The main thing you want is to try and keep the bracket U-channel it'self from folding when there is an impact. The tube is likely more than strong enough, but the U-channel will likely splay out and bend almost as easily as a flat bar.

Another thing you could try to reinforce the bracket is adding triangulation to the "U" itself to help keep it from splaying out. Cut some more strips like you did to make the sides of the "U" but then weld them so that they tie the top edge of the "U" profile to the middle of the bottom of the "U" like this:

TmqxYc5.jpg


I'd only use that where you have very little clearance around the cables though, it's far better to brace it using the previous method. But this would help shore up the brackets fairly well if that's all you can manage to fit.
 

Happy Hummer

Well-Known Member
Messages
1,465
Location
Wisconsin
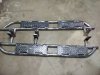
Done a bunch more work to these this week so far. Need to do a major cleanup and test fit. I think there looking good though.
 

Happy Hummer

Well-Known Member
Messages
1,465
Location
Wisconsin
Cleanup is complete but test fit not doing, going so well. Heat transfer from welding distorted the rails of the slider to the extent that the back holes on passenger side will not line up anymore without modifications. I do not own a oxy torch nor will I be purchasing one this year lol so I need to make a change with the shape of rails some other way or to modify the mounting brackets so they can fit. Pizzer is I'd already cleared the slag and junk and have em ready for acetone wash and paint. Oh well live and learn more I guess. I've not tried drivers side yet. Passenger side was enough of a Jones for one day.

Is there a way to flaten them back without torch?
 
Messages
13
Location
Washington
Think they look great for what your purpose is for them. I read you are stumped as to addding gussets to the mounting points. Have you thought about a bolt on gusset. It would perform the same way as a welded one however your cables can be designed around the gussets.
 

Happy Hummer

Well-Known Member
Messages
1,465
Location
Wisconsin
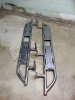
I wanted to update you all I've spent numerous hours again today and got the units to fit to the H3.
It was necessary to remakes the passenger side rear leg with 3/16 plate double and gusseted plus it was very important to plasma cut the openings so as to compensate for heat warp.
The driver side is still the same as before but it was necessary to gusset it and to widen the holes with plasma. Albiet I'm not done with these. I still have one more thorough cleanup and chem wash, then paint.

IMG_20171003_233552.jpg

IMG_20171008_230710.jpg

I'll be finishing up this week I hope. Stay tuned!
And thanks....
 

Happy Hummer

Well-Known Member
Messages
1,465
Location
Wisconsin
They are now gusseted. Also cleaned up a lot of the welds and ran a new weld on a few that I ground down first. I think the fact that I could lift the whole H3 with jack from center of drivers side with 4 of 6 bolts installed speaks to there beefy ness. I was trying to compensate for heat warp while negotiating placement of slider. They must way 100+ lbs. each lol.
 
Last edited:

Happy Hummer

Well-Known Member
Messages
1,465
Location
Wisconsin
No work on these this last few day. Business has been very busy (thank God) and the 2001 Jeep Cherokee decided to puke out its battery. Lol! It just up and died. I've had that happen before but usually there is a warning. Nothing just cr@p'd out all in a jiffy. The rear of the XJ is making some sorta of rubbing dragging noise today so.... I get to fix something else... Yea!
Also ordered the new differential bushing for the H3 as the one in there is just sloppy as can be.
 

Happy Hummer

Well-Known Member
Messages
1,465
Location
Wisconsin
Well the steps have had three Coates of paint and other than the stray fussy or bit of shmootz there pretty darn nice. Went with Herculiner spray urethane and I can tell ya the stuff reeks. Wow, it is just nasty. I'm just waiting for them to dry over the next day or two out back and then there going on the Hummer H3. Yeah....
I'll be posting pics soon. Stay tuned...
 

humvee

Well-Known Member
Messages
507
Location
Doha, Qatar
NICE! Best feeling in the world to have a 1 of 1 item on your truck, and to build it yourself is something else altogether.
Lets see it mounted.
 

Happy Hummer

Well-Known Member
Messages
1,465
Location
Wisconsin
Worked on em tonight got them fully installed. Touched up any spots needing it and adjusted where necessary.
They went pretty well. Not sure about this brand of paint chosen. Never used spray Herculiner before. It seemed to mar and chip rather easy. I mean it was while using a block of wood and jack to make slight adjustments so maybe that is to be expected. I wired brushed an area for touch up and it took considerable force to get it prepared for a touch up coat.

No pics as it is very late and pitch black out.
 
Last edited:

Happy Hummer

Well-Known Member
Messages
1,465
Location
Wisconsin
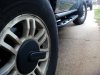
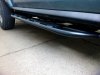
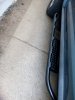
As promised finished pics.
Gonna take a break now.....

IMG_20171021_112943.jpg

IMG_20171021_112926.jpg


Thanks to everyone.... Grateful to have such a great community on H4O
 
Last edited:
Top