• Welcome to H4O! For a reduced ad experience, please login or register with the forum.

2007 H3 I5 Build

derian06

Red Rockett
Messages
1,866
Location
Madison, AL
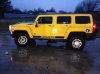
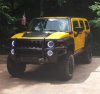
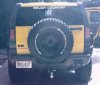
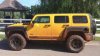
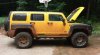
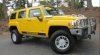
4 or 5 months ago I was blessed enough to have gotten my dream car a, being 15 years old I knew absolutely nothing about cars. Over those 4 or 5 months I started learning and adding mods to my car as fast as I could get the money. Now hundreds of hours of work later It's not complete but it's a start. Today being my birthday I decided to finally make a build thread. First not knowing anything about torsion keys, I got an offroad shop (one that i'm interning at now) to install a 200$ leveling kit instead of just doing a T bar crank. Then I let my friend drive is, he slid into a ditch and on the way out my hummer suffered a broken power steering pump (never trusting it with a friend again). Next, I absolutely hated all the chrome on my Hummer. So I discovered a product called plasti-dip, i'm sure you all know of it and I sprayed everything. 60$ and countless hours later I had a new car. Next I painted my brake caliper with dupli-color caliper paint 12$. Then came my Oracles, a shop quoted me 1300$ and I defiantly wasn't about to spend that much on some lights. So I bought the oracles, split my headlights housing, epoxyed them in, and wired them. Knowing nothing about wiring, this was a pain in the ***. Next I decided to cut off my muffler, to give it the voice to match the looks and man did it make a difference! My birthday was coming up and I made a deal with my dad to do some work and in return I got new 315/75/15 bfg km2's and a PCM tune from PCMforless to go along with it. The drive is absolutely fantastic with the pcm tune and 35's even better then stock. I also picked up some spyder l.e.d. smoked tail lights from amazon 120$ shipped! I just ordered an Airdoc CAI and I should have that put on pretty soon. Then after that i'm really looking into some UCP but boy is it expensive! If you actually read all of this thank you! any advice is much appreciated, I'm just here to learn!


---Photo bucket contains more pictures!
http://s1031.photobucket.com/user/Derian_Johnson/slideshow/HUMMER H3 Build
 

Attachments

  • Screen Shot 2014-05-28 at 11.13.17 PM.jpg
    Screen Shot 2014-05-28 at 11.13.17 PM.jpg
    21.1 KB · Views: 452
  • Screen Shot 2014-05-28 at 11.12.57 PM.jpg
    Screen Shot 2014-05-28 at 11.12.57 PM.jpg
    16.6 KB · Views: 442
  • Screen Shot 2014-06-09 at 2.26.31 AM.jpg
    Screen Shot 2014-06-09 at 2.26.31 AM.jpg
    13.1 KB · Views: 505
  • Screen Shot 2014-06-09 at 2.26.46 AM.jpg
    Screen Shot 2014-06-09 at 2.26.46 AM.jpg
    14 KB · Views: 439

kilroy

Well-Known Member
Messages
110
Location
Owosso MI
I'm gonna need tires by the end of summer, your dad need any more work done around the house? Lol. Seriously though, congratulations on the ride and yeah, don't let your friends drive it especially without you. They usually break things that aren't theirs.
 

derian06

Red Rockett
Messages
1,866
Location
Madison, AL
Looking good in the neighborhood
1 hour after getting my license:wink: I'll put up a pic of what it looks like now. I swear I never remember to take pictures while i'm actually wheeling.
 

Attachments

  • Screen Shot 2014-06-11 at 2.00.42 AM.jpg
    Screen Shot 2014-06-11 at 2.00.42 AM.jpg
    20.3 KB · Views: 435

rsc

Well-Known Member
Messages
1,087
Location
Tulsa
1 hour after getting my license:wink: I'll put up a pic of what it looks like now. I swear I never remember to take pictures while i'm actually wheeling.
I know the feeling. I have so much fun I forget to stop and film it.
 

derian06

Red Rockett
Messages
1,866
Location
Madison, AL
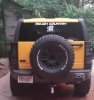
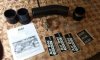
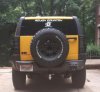
The Airdoc intake and the tail light guards came in, and boy were they a total PITA. The airdoc intake was such a pain, because those freaking clamps would not go on evenly and i'm pretty OCD when it comes to things like that. With the tail light guards 3 of the 4 little boxes that you put screws into to hold the tail lights in place decided to melt to the screw. I don't know how but they welded together. So I took my front license plate mounting boxes and shoved those where i pried out the old ones, and sure enough it worked perfectly! As for performance, I didn't feel a huge boost maybe it was because I was in a bad mood from things breaking on my rig, but I kept on speeding on accident. That seems to always be a good sign.:giggle: The whole process took me about 3 hours. I have some 1" wheel spacers coming in next week, to get rid of the rub from my tires. I also failed to mention that I installed some trail duty 1/2" extended bump stops in my first post. That was a piece of cake, just pried out the old ones, put some soap on the new ones and used a hockey stick to wedge'em up. The ride was alot less bouncy after that.

If anyone could tell me how to post big pictures, that would help! and I will try to get a higher quality pic of the tail light guards tomorrow.
 

Attachments

  • Screen Shot 2014-06-11 at 10.48.50 PM.jpg
    Screen Shot 2014-06-11 at 10.48.50 PM.jpg
    20.3 KB · Views: 409
  • Screen Shot 2014-06-11 at 10.49.08 PM.jpg
    Screen Shot 2014-06-11 at 10.49.08 PM.jpg
    21.8 KB · Views: 454
  • Screen Shot 2014-06-11 at 10.49.19 PM.jpg
    Screen Shot 2014-06-11 at 10.49.19 PM.jpg
    12.6 KB · Views: 440
  • Screen Shot 2014-06-11 at 10.49.40 PM.jpg
    Screen Shot 2014-06-11 at 10.49.40 PM.jpg
    21 KB · Views: 441

derian06

Red Rockett
Messages
1,866
Location
Madison, AL
My Plasti-Dip is peeling TERRIBLY from mudding, and nothing will clean these things anyways. I would really like to strip everything down and spray it with bed liner. But I have never really painted anything before except for the plasti-dip. So if someone could tell me what I need to get to make this happen I would appreciate it a lot. I would be spraying my grille, brush guard(if possible), fenders, and The grey part in between the 2 tow hooks. Thank you to everyone who has commented positive things on my Build, it really goes a long way!
 

poweraidon

Well-Known Member
Messages
830
Location
georgia
You probably didn't spray enough coats on there and with the heat from the sun it didn't help either. You can buy some degreaser and it'll clean the mud right off the dip


Sent from my iPhone using Tapatalk
 

derian06

Red Rockett
Messages
1,866
Location
Madison, AL
You probably didn't spray enough coats on there and with the heat from the sun it didn't help either. You can buy some degreaser and it'll clean the mud right off the dip

I sprayed 8 coats but i let some THICK clay sit on it over night, then the power washer sprayed they clay off with some of my plasti-dip with it. Do you recomend any degreaser? I've heard that simple green doesnt even bring out the stains. I put on some extreme shine gel from armor all and it does an okay job at covering it up.
 

motley1987

Well-Known Member
Messages
102
Location
Delaware
Nice looking ride! I like that you're willing to try to make something work yourself if things aren't going as perfectly as the directions would indicate. Keep the updates coming. Even if everyone's tastes are different we're all happy to see others out working on their rig!
 

zackcrum

Well-Known Member
Messages
543
Location
Corinth MS
My Plasti-Dip is peeling TERRIBLY from mudding, and nothing will clean these things anyways. I would really like to strip everything down and spray it with bed liner. But I have never really painted anything before except for the plasti-dip. So if someone could tell me what I need to get to make this happen I would appreciate it a lot. I would be spraying my grille, brush guard(if possible), fenders, and The grey part in between the 2 tow hooks. Thank you to everyone who has commented positive things on my Build, it really goes a long way!
I did my emblems and grill without any prepwork and they are holding up perfectly with numerous clay clad pressure washes, mud runs, tree limbs, and even the Louisiana love bug season [emoji106][emoji108]
 

derian06

Red Rockett
Messages
1,866
Location
Madison, AL
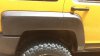
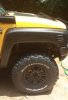
I borrowed some simple green from a friend and sprayed my rims and fender, at first it left big streak marks. Then I took some more simple green and a micro fiber towel and really rubbed it in. Next I sprayed it down with some water and dried it with a clean micro fiber towel. Now all the stains are gone and it almost looks as good as new.

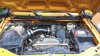
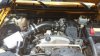
I also have some pictures of the tail light guards and the engine bay after some cleaning.
 

Attachments

  • Screen Shot 2014-06-12 at 2.52.39 PM.jpg
    Screen Shot 2014-06-12 at 2.52.39 PM.jpg
    16 KB · Views: 357
  • Screen Shot 2014-06-12 at 2.53.03 PM.jpg
    Screen Shot 2014-06-12 at 2.53.03 PM.jpg
    14.3 KB · Views: 355
  • Screen Shot 2014-06-12 at 2.53.22 PM.jpg
    Screen Shot 2014-06-12 at 2.53.22 PM.jpg
    9.7 KB · Views: 383
  • Screen Shot 2014-06-12 at 2.53.36 PM.jpg
    Screen Shot 2014-06-12 at 2.53.36 PM.jpg
    21.4 KB · Views: 335

K0PIR

Well-Known Member
Messages
216
Location
Pierre, SD
Good lookin Hummer. Patience goes a long way when painting. People have had good success with bed liner and there are other threads on it.

Sent from my LG-P870 using Tapatalk
 

poweraidon

Well-Known Member
Messages
830
Location
georgia
I borrowed some simple green from a friend and sprayed my rims and fender, at first it left big streak marks. Then I took some more simple green and a micro fiber towel and really rubbed it in. Next I sprayed it down with some water and dried it with a clean micro fiber towel. Now all the stains are gone and it almost looks as good as new.

I also have some pictures of the tail light guards and the engine bay after some cleaning.

Simple green works or you could get some of this

2yqe6e6a.jpg


You just spray it on and leave it on there for a few minutes and rinse off. Really easy and works really well


Sent from my iPhone using Tapatalk
 

Hans3T

Lif"T"ed
Messages
3,035
Location
NC
Congrats on achieving a dream. I know how good that feels. Nice to see some of you "youths" still have a passion for the brand.
 
Top