Pioneer AVIC-Z1 Head Unit Install:
Now the fun really starts…the Nav heat unit installation. This is the time to take a break, have a cold drink, relax, because you are about to shove a big NAV unit into a hole that is packed with more wiring than required by ten factory radios.
1. Position the radio onto the console, in front of the gear shifter; CAUTION, do not scratch the screen, use a towel.
Connect the Peripheral adapter to the 24-pin and 12-pin GM connectors.
2. Connect the pink vehicle speed sensor wire to the
pioneer harness.
3. Connect the violet/white reverse signal wire to the
Pioneer harness.
4. Butt end the camera ground wire to the grounds you soldered prior to installation.
5. Connect the ground wire to the crosscar beam brace behind the radio area. Just look in and you will see a couple 10mm bolts attaching a brace to the cross car beam. Loosen and slide the ground wire under the bolt, and then tighten.
6. Install the antenna adapter to the vehicle’s AM/FM antenna.
7. Install the microphone lead.
8. Install the NAV GPS lead.
9. Install the XM receiver power/ground connector and the XM signal wire to the XM receiver.
10. Install the signal lead from the XM receiver to the back of the
Pioneer NAV unit.
11. Connect the camera’s hot lead to the fuse holder of the wire soldered to the adapter harness.
12. Connect the camera’s signal wire to the signal wire lead from the NAV unit.
13. I attached the chime module to the bracket just above the glove box with two-sided tape.
14. I positioned the super long, thick, XM receiver wire inside the left of the radio opening, just to get it out of the way.
15. I positioned the remaining wires and adapter below where the radio mounts, then slowly slid the NAV unit into the hole, and attached with four screws. If the bracket on the NAV unit does not fit, flush with the I/P, reach behind and move the wire harnesses around until it fits flush. Do not want to cut any wires.
16. Before reassembling the center trim panel, test the unit. Make sure all the attached components such as XM and rear camera operate. Until you call XM to turn on the box, you will get a preview on channel 1 and 0. Channel 0 also gives you the box ID number that you will need for XM.
Test the rear camera, but make sure you follow the instruction manual on setup. You have to turn the feature on via the NAV unit settings screen.
17. Once you feel that everything operates ok, install the center trim panel.
18. Connect all the connectors, and position the panel to the I/P and tap with your hand where the six fasteners are and it will pop into place. Make sure to align the two A/C ducts with the vents in the trim panel.
19. Install the kick panel and sill panel moldings.
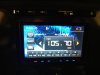
Rear Camera View:
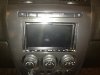
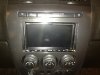
Installed:
These procedures are from the install on my 2006 H3, please understand that GM (as well as any manufacture) will sometimes change wire colors in the same model year, and in future model years. So, if you have any doubt, check for voltage at the wire before connecting a wire from the radio.
You can be pretty sure the wires between the factory radio, adapter and new NAV unit will be the same, since these follow a wiring code for radio power, ground, speaker, etc., wires.
The total time for the install was about 4 hours. I did waste about a half-hour on the wiring for the camera along the top of the frame rail, just to remove it and start over again. So, this install should take someone familiar with automotive wiring and trim panel removal about 3-4 hours.