• Welcome to H4O! For a reduced ad experience, please login or register with the forum.

FJ4overland

SuperBuickGuy

Well-Known Member
Messages
3,403
Location
Woodinville, WA
My shop got more crowded today, but hopefully the shelves will cure some of that
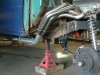
I got these cool stands - they used to build boilers, as they're adjustable, I figure they'll work well for frame work


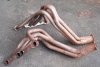
I couldn't do it... chop the swap headers up... so I bought some stainless ones for cheap


hereforeto the aforementioned shelves


these may have cost me more because I think I reinjured my knee... ah well to quote the immortal Homer "health insurance is the best deal, ever."


SuperBuickGuy

Well-Known Member
Messages
3,403
Location
Woodinville, WA
not a lot done today... but, despite being low on time, I figure if I do a bit each night, it will get done


yep, longer, but I think that's going to be a good thing because it will give me room to adapt from my transmission.... though, at the expense of driveshaft length


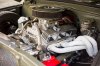
in other news, put the headers on, I need to do some modification....
 

SuperBuickGuy

Well-Known Member
Messages
3,403
Location
Woodinville, WA
As was mentioned before, there is a space problem on the driver's side... what wasn't even mentioned is the biggest impediment still is to come - the upper control arm for the 3 link...
anyway, the stuff


this side isn't great either


first, adapt the slave cylinder...


Buick is relaxed with it all


I thought I would consider center dumps, but those won't work either because of the 3rd link


so there it is... custom headers. I haven't decided whether or not it's going to just functional or functional and pretty... but the tentative plan is this:
Cut the #1 cylinder pipe in 2 places and move the flange to the engine
cut 3,5, & 7 off in between the flat spot on top and simply move the header away until the dump ends on the outside of the frame. Where the pretty or not will come in is how much work I want to do on #1 - that would take at least 5 cuts to reaim it correctly.... I may say "screw it" and simply make it leak proof and wrap it.

On the passenger side


I'll probably just pie cut the tops and rotate it all towards the outside of the frame.
as a side note, if I ever do turbos on a sbc, these are the headers I'd use... flip them over and they're perfect to cut off and replace with t4 flanges
 

4speedfunk

Well-Known Member
Messages
4,250
Location
Tardville
Have you considered some fender-well type headers? Ones like the old Chevy II's and 55-57 Chevys ran? These would route the exhaust over the top of the frame rails and dump behind the inner fenders and in front of the firewall. You don't see them much on 4x4s but, it looks like your FJ could really take advantage of the extra space. You would gain so much space underneath if you could get the exhaust out of there...the 3-link would be no problem. I Googled some pics to show what I'm talking about...
attachment.php
attachment.php
attachment.php
attachment.php
attachment.php


You can find these at swap meets, and I even think Jegs sells a generic fenderwell header. Whatever you get would probably need some modification but, at least you would have good starting point. Just throwin it out there. Great looking project so far.
 

Attachments

  • fw-1.jpg
    fw-1.jpg
    34.6 KB · Views: 1,159
  • fw-2.jpg
    fw-2.jpg
    102.2 KB · Views: 1,664
  • fw-3.jpg
    fw-3.jpg
    158.1 KB · Views: 971
  • fw-4.jpg
    fw-4.jpg
    482.7 KB · Views: 1,995
  • fw-5.JPG
    fw-5.JPG
    83.1 KB · Views: 1,185

SuperBuickGuy

Well-Known Member
Messages
3,403
Location
Woodinville, WA
Speedway also sells fender header kits, which saves you the hassle of cutting them apart - problem is, and I haven't looked recently, is they're all mild steel. I want stainless. The other problem is I'd have to be pretty lucky to get ones that actually fit... but, with that said, who knows - if I find the right ones all is good - and I get longer tubes which equal more torque...
 

SuperBuickGuy

Well-Known Member
Messages
3,403
Location
Woodinville, WA
well ahead of you ;)
photo1-1-1.jpg


IMG_0977.jpg


IMG_2616.jpg


IMG_2620.jpg


My suspension is, currently, quite a bit different but it's still a linked suspension... I'm hoping my HP44 doesn't interfere with the 3 link
3linkf2.jpg

suspension I've got the brackets for... the rear is this suspension
1_76.jpg


I wonder why, though, they offset the Dana 60 then used a center-out Atlas (rather than an Orion)... it seemed planned because the Orion case is pretty much a beefy stock '40 case with new bits inside - thus the output is still on the passenger side.... that one, they put the front 60 on the driver's side (Ford).
 

4speedfunk

Well-Known Member
Messages
4,250
Location
Tardville
Passenger drop...driver drop...whatever. If you can't find one, then make one! (takes a big lathe, though). This one started out as a drivers-drop Ford HP housing just like yours. I cut down the passenger-side tube to the same exact length as a GM low-pinion. Then I made a brand new tube for he driver-side, also the same length as a GM housing. Put it all together...welded it up...stuck-on the innner-Cs...and TA-DAH! The result is a high-pinion, passenger-drop, Dana 44 built to GM specs. It uses stock length GM shafts, either GM, Yukon, G2, USA Alloy, RCV, etc. The only Ford parts are the inner axle seals...

[video=youtube;OyDcvVuvMjY]https://www.youtube.com/watch?v=OyDcvVuvMjY&feature=youtu.be[/video]
 
Last edited:

SuperBuickGuy

Well-Known Member
Messages
3,403
Location
Woodinville, WA
it's the offset of the pinion that's causing me some grief and may make my desire to use a GM 44 short-side axle nothing more than a dream.

kickass lathe, though.... today, I wished I still had mine (which would have been the first time I missed it since I sold it two years ago)
 

SuperBuickGuy

Well-Known Member
Messages
3,403
Location
Woodinville, WA
reference... if you blow a seal

http://www.timken.com/en-us/products/Documents/Seal-Specification-Guide.pdf

I bought 2 seals today, both didn't work... however, this site got me the part number so, hopefully, my seals will stay unblown
 

SuperBuickGuy

Well-Known Member
Messages
3,403
Location
Woodinville, WA
tonight's fun


time to build a template for the adapter

basically, that's 1 1/2" to make the transition from 5 to 6 bolt


and voila


a template.... fortunately, there's an easy way to make sure the t-case and the transmission stay in line, and I probably will use the adapter I bought, though, I may actually hit ebay up for a thinner one because I need every fraction of an inch.... we'll see... or I'll just make it myself
 

SuperBuickGuy

Well-Known Member
Messages
3,403
Location
Woodinville, WA
well, the new input shaft is in with its new seal and bearing


I got some 1/2" steel today to make adapters


pipe to connect the two bits


and the fun part.... cutting them out


SuperBuickGuy

Well-Known Member
Messages
3,403
Location
Woodinville, WA
so, I spent some time making steel into scrap

testing whether I wanted to max my plasma or use my baby torch..


went with torch... was quieter and more peaceful... of course, there wasn't a lot of peace since turkey got my dark, tinted, cutting glasses


the whole point


once the plate cooled off, I painted the outline of what it needs to look like onto it


and started grinding.... I've a ways to go, but it's closer


oh and spent some time making a pipe... I need a specific diameter - and 4 1/2 wasn't it... so I added some material and caulked with my mig too...


it should be about 1/16 large... it was nearly an 1/8 tonight - but it is still pretty warm from the heat to bend and the weld to the inner pipe..

Happy thanksgiving from the turkey and his poo scooper
 

SuperBuickGuy

Well-Known Member
Messages
3,403
Location
Woodinville, WA
Serious, London is Kinsey's (our dog) mom. London is a litter mate of Nathan... it's ironic because my wife did not want a show dog, just the best trailing dog she could get - she has both, but we're still not (as of this moment) showing her - but the dog show folks in the Bloodhound SAR group want to show Kinsey... so we'll see, my wife's lips say no, but her leash says yes.
 

SuperBuickGuy

Well-Known Member
Messages
3,403
Location
Woodinville, WA
anyway, back to cruiser related content

I can sum up the work done in 2 pictures


I've decided to go a different direction and simply buy the DOM tubing to connect the two adapters.... not really the cheapest option (I could have bought an AX15 for about what the adapter is costing me), however, this is a better transmission than an AX15 and not 300 lbs like the NV4500 - so, at least at this moment, it seems like a good idea.
 

SuperBuickGuy

Well-Known Member
Messages
3,403
Location
Woodinville, WA
If anyone is interested.... I took advantage of the Chassis unlimited 20% off today, and got a coupon for 10% off... I've no use for it, but if anyone doesn't do the cybermonday deal; this coupon voids in 7 days Your coupon code is valid on Chassis Unlimited products only. newsletter-BWBXKLYS-CU


they said share, so consider this sharing
 

SuperBuickGuy

Well-Known Member
Messages
3,403
Location
Woodinville, WA
so, it's been two days since I last updated this thread and nothing but a whole lot of dust has been happening... why, again, did I sell my lathe? oh yeah, cause it was a paperweight - but it would have been useful today.
I got the DOM pipe today, and did a bit of grinding on it

the easy end was done
cut it down, and started on the other end

of course, I used my CNC grinder to turn it down

hey, look at that


and that


and a bit of this


and this too


for the sharp eyed and the trolls, they'll notice the transfer case is hitting the floor... so yes, there will be a moving up of the floorboard to get the transfer case above the bottom of the frame rails... so tomorrow, hopefully, I can accomplish that and a rear cross member... then I'm kind of stuck until I get the axles. I don't want to build the headers the rebuild them when a suspension bit interferes... but as many know, I've more projects than life expectancy - so I may drag the effing Land Rover in and fix that transmission leak - then see if I can make some diesel noise with it since it basically should run once I finish the cooling system.

I do wonder if anyone on 355nation would be interested in a 5 speed to Dana 300 adapter...
 

SuperBuickGuy

Well-Known Member
Messages
3,403
Location
Woodinville, WA
didn't do anything with the '40 last night, so Buick used it as a dog house


I spent some quality time working on my brake - now I got the parts off, but I really need to evaluate what I should do with this brake before I fix the screw. I love mechanical brakes, but if I change this to hydraulic; 1) it'd be sellable (which I can't imagine doing) because mechanical brakes are high-risk to insure for a business, and 2) hydraulics are a lot more adjustable... I have some of the bits to do it.... anyway, for now, I'll just use the jack under one end - hooky, but it will work.


a very expensive press


now an anchor


and a lift
 

SuperBuickGuy

Well-Known Member
Messages
3,403
Location
Woodinville, WA
christmas party got in the way of any real progress... but I did a bit


and now we know why I didn't make the motor mounts solid yet... they need to come down about 4"... I swear I should make a flip front end to make it easier to work on... but I'm not going to, but it'd be a good idea if I did it.

I also got some more random bits
 

SuperBuickGuy

Well-Known Member
Messages
3,403
Location
Woodinville, WA
I wouldn't bother posting this, but this seal was a b***h to find...


I probably will put the clutch in when I put this back together, not so much that I won't have opportunity when I blow this apart to paint it; but because I need the space.
 
Top