• Welcome to H4O! For a reduced ad experience, please login or register with the forum.

What did you do with your H3 recently? NEW

RamRod

Well-Known Member
Messages
3,914
Location
AB, Canada
View attachment 23533I did clearance the pinch welds about 1/2" where the legs intersect I don't recall how many spot welds this took out but it was minimal and I tacked the edges, primed and painted the heck out of it and a couple coats of plasti-dip. I expect ill have to come back and add a bushing on the edge that contacts the slider legs. Not ideal but clearance was priority. I also don't wheel nearly as hard as you do and these are more precautionary. I'll be able to stand on to access the roof along the whole edge and
I pity the fool who dings their door into me now.
That turned out great!

Maybe you can use that black plastic door trim on the pinch weld to keep the sliders from rubbing the paint off the pinch welds

Sent from my SM-G935W8 using Tapatalk
 

Alpha X

Well-Known Member
Messages
453
Location
The Motor City
This evening I got my hands on a nice pre-owned roof top tent, that has technically never been used. It's like brand new. Now I need to move forward with the RTT bed rack for my H3T.
 

Ghostbuster

Well-Known Member
Messages
862
Location
United States
It wasn't free that's for sure. It was another $200. I had planned on doing it myself but really wanted the warranty intact, so I semi-jokingly posted in the invoice comments when I paid, to paint it black. They responded in email that they would be willing to do it. It also delayed time between order and shipment. Ordered on 2/14, Confirmed about paint on 2/15. Shipped on 4/4 and received 4/9 (54 days total) Though I must say communication with Headlight Revolution was great the entire duration. They also said this on 3/26:

"I want to give you an update on your order. We were able to get to your lights and make a little bit of progress on them. Unfortunately, they were impossible to open without cutting the lenses off. So, the edge of the lens will look cut and siliconed back together. That was the only way to get your lights apart to make them black. But you will not be able to see this part at all once the light is installed in the Hummer.

Did you want these lights painted Gloss, Satin or Matte black?"

I was fine with this and on inspection I still stand by that. Headlight Revolution also stated:

"They did indeed take a lot of extra effort over a normal retrofit. You got a steal deal man if we ever do this again it's going to cost quite a bit more for labor. I also think they look great and they turned out pretty good, you’ll have to send me a picture once you get them installed. Excited to see what it looks like!
Thanks"

How's that for a long winded answer :)

Could have sold you my lightly used ones lol.


Sent from my iPhone using Tapatalk
 

cowboy_tech

Well-Known Member
Messages
78
Location
Avondale, CO
Finally bought new tires for my 3. 315/75R16
aaa84c0dc6d3e5cbe7e07b1b6042051c.jpg
f31cacf04853ca345043f27790f86fb7.jpg
63d8ccc4c60e19ae56f6b4dc4785920b.jpg


Sent from my LG-H932 using Tapatalk
 

Traxx

Well-Known Member
Messages
682
Location
PNW
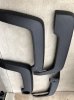
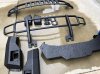
Stopped by to pick up my fenders from the LineX shop. Came out great, 477 with tax for the Ultra so a buck twenty a fender which isn't bad. Supposed to be sunshine on sunday so i'm going to strip front end of the brush guard, grille, vents and Thor bumper and drop them off on monday for a couple weeks and then get the fenders installed. Quoted 750 to do the front end and 250 to do the hood later. Might throw the d rings and brackets in the box and do them too I guess.

BTW if you do this then do yourself a favor and spend the 50 bucks on new clips for the fenders since most of them will break. I tried being careful on the first fender, broke most of them anyway then was like yea, eff this, and ripped them off. :emb:


IMG_5152-2.jpg
 

rascole

Well-Known Member
Messages
2,843
Location
Bellflower, CA
Should've had them tape off the holes for the clips and marker lights. They will be a very tight fit now. I would leave the bumper and D rings alone. They will get dinged and it's easier to fix with rattle can.
 

Traxx

Well-Known Member
Messages
682
Location
PNW
No problem with the clearance lights they just popped in, they used the newer armor coating which is thinner and supposedly stronger.
 

the_real_hacksaw

Well-Known Member
Messages
73
Location
Freeborn
Replaced the right front wheel hub and abs sensor and the water pump...thank god for extended warranty...$100 bill out the door with no grease on my hands


Sent from my iPhone using Tapatalk
 

svxr8dr

Well-Known Member
Messages
200
Location
SW WA ST
Upgraded battery (Odyssey - PN# 75-86-PC1230DT) and Positive side battery terminal, then took Schwarttzy's advice regarding a CB. Cobra 75WXST 40-Channel CB Radio, Roc Doc spare tire bracket mount, Firestik MU-8R18 “EZ-Install ”18′ CB Radio Antenna Coax, FireStik K-1A Push-n-Twist quick disconnect, Firestik K4R Heavy-Duty Stud Mount, and a Firestik FS-4BK 4′ Ii Fs Series Tunable Tip Cb Antenna.


-PAXP-deijE.gif
 
Last edited:

Chris Laun

Well-Known Member
Messages
78
Location
Los Angeles, CA
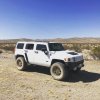
Took the H3 out to Barstow, CA to meet up with some friends doing a charity poker run. Ran two 20 mile courses and had a blast bombing around the desert. Everyone else there were running Polaris/Can-Am SxS's, dirt bikes, or quads. I was the only person there with a full size vehicle surprisingly. Every checkpoint I got to earned the remark "Holy crap you're running a Hummer out here?! Badass!" Whole lotta fun, and has definitely helped me decide to go ahead and start working on some custom long travel ideas. Also, my friend who tagged along with me was not happy about the bumpy ride in the back seat:giggle:
H3.4.28.18_zpslzllr7y6.jpg
 
Last edited:

H3Wolf

Well-Known Member
Messages
192
Location
United States
So I ordered a bunch of parts, lower control arm bushings, lower ball joints, upper control arms, Bilstein 5100 shocks, 2 suspension lift, touch screen stereo, jk head lights, led tail lights, CV axels, side markers new 5 gal gas cans, both red. Steel cable, 13" light bar. Yep going to be fun. Today I just added a second rack basket, so now there's two on there then added my home made branch guards. And also I might make some of you cringe, but I sealed and disabled the sunroof. Still can look through it but can't open it and don't need to worry about flooding interior from clogged drains. Also the next step is to truck bed line the roof and silver rack so it matches. The front one will be cargo and the back one will be for a tent top I will be making.
d0e6d135335eceaf6466ae4f3407115d.jpg
2b1424dde00a9246ba237ea5eb84d28f.jpg


Sent from my Moto Z (2) using Tapatalk
 

Chimpy

Well-Known Member
Messages
105
Location
Ohio
Yesterday I finally replaced both side marker light bulbs, front axle seals, CV axles, and hubs. What a way to begin the week.
 

Chimpy

Well-Known Member
Messages
105
Location
Ohio
How was it replacing the CV axels

Sent from my Moto Z (2) using Tapatalk

Actually, replacing CVs is pretty straightforward. The hubs would have been easy as well except that mine were seized by rust in the knuckles. I soaked them with PB Blaster and beat the holy crap out of them and they did not move so I removed the knuckles. My buddy has a press in the shop where he works and I took him the knuckles with hubs still in them. He said it gave the press a work out for sure.LOL Amazingly, the dust shields were both intact and I re-installed them with the new hubs. I highly suggest that if you are going to replace the CVs, obviously do both sides and re-torque the new axle nuts TO SPEC. Many shops ( and youtube videos) will use the air impact to tighten the axle nuts. This is a sure-fire way to a premature death of your hubs. Put on your man pants, grab a torque wrench and torque them the correct way to spec. LOL
The next project will be removing and replacing the front diff bushing.
 
Top